OpenShift
Make sure the prerequisites for StorageOS are satisfied before proceeding. Including the deployment of an etcd cluster and configuration of CRI-O PID limits.
For OpenShift upgrades, refer to the OpenShift platform page.
If you have installed OpenShift in AWS ensure that the requisite ports are opened for the worker nodes’ security group.
Make sure to add a StorageOS licence after installing.
StorageOS v2 supports OpenShift v4. For more information check the OpenShift platform page.
OperatorHub
-
Select the
OperatorHubfrom the Catalog sub menu and search for StorageOS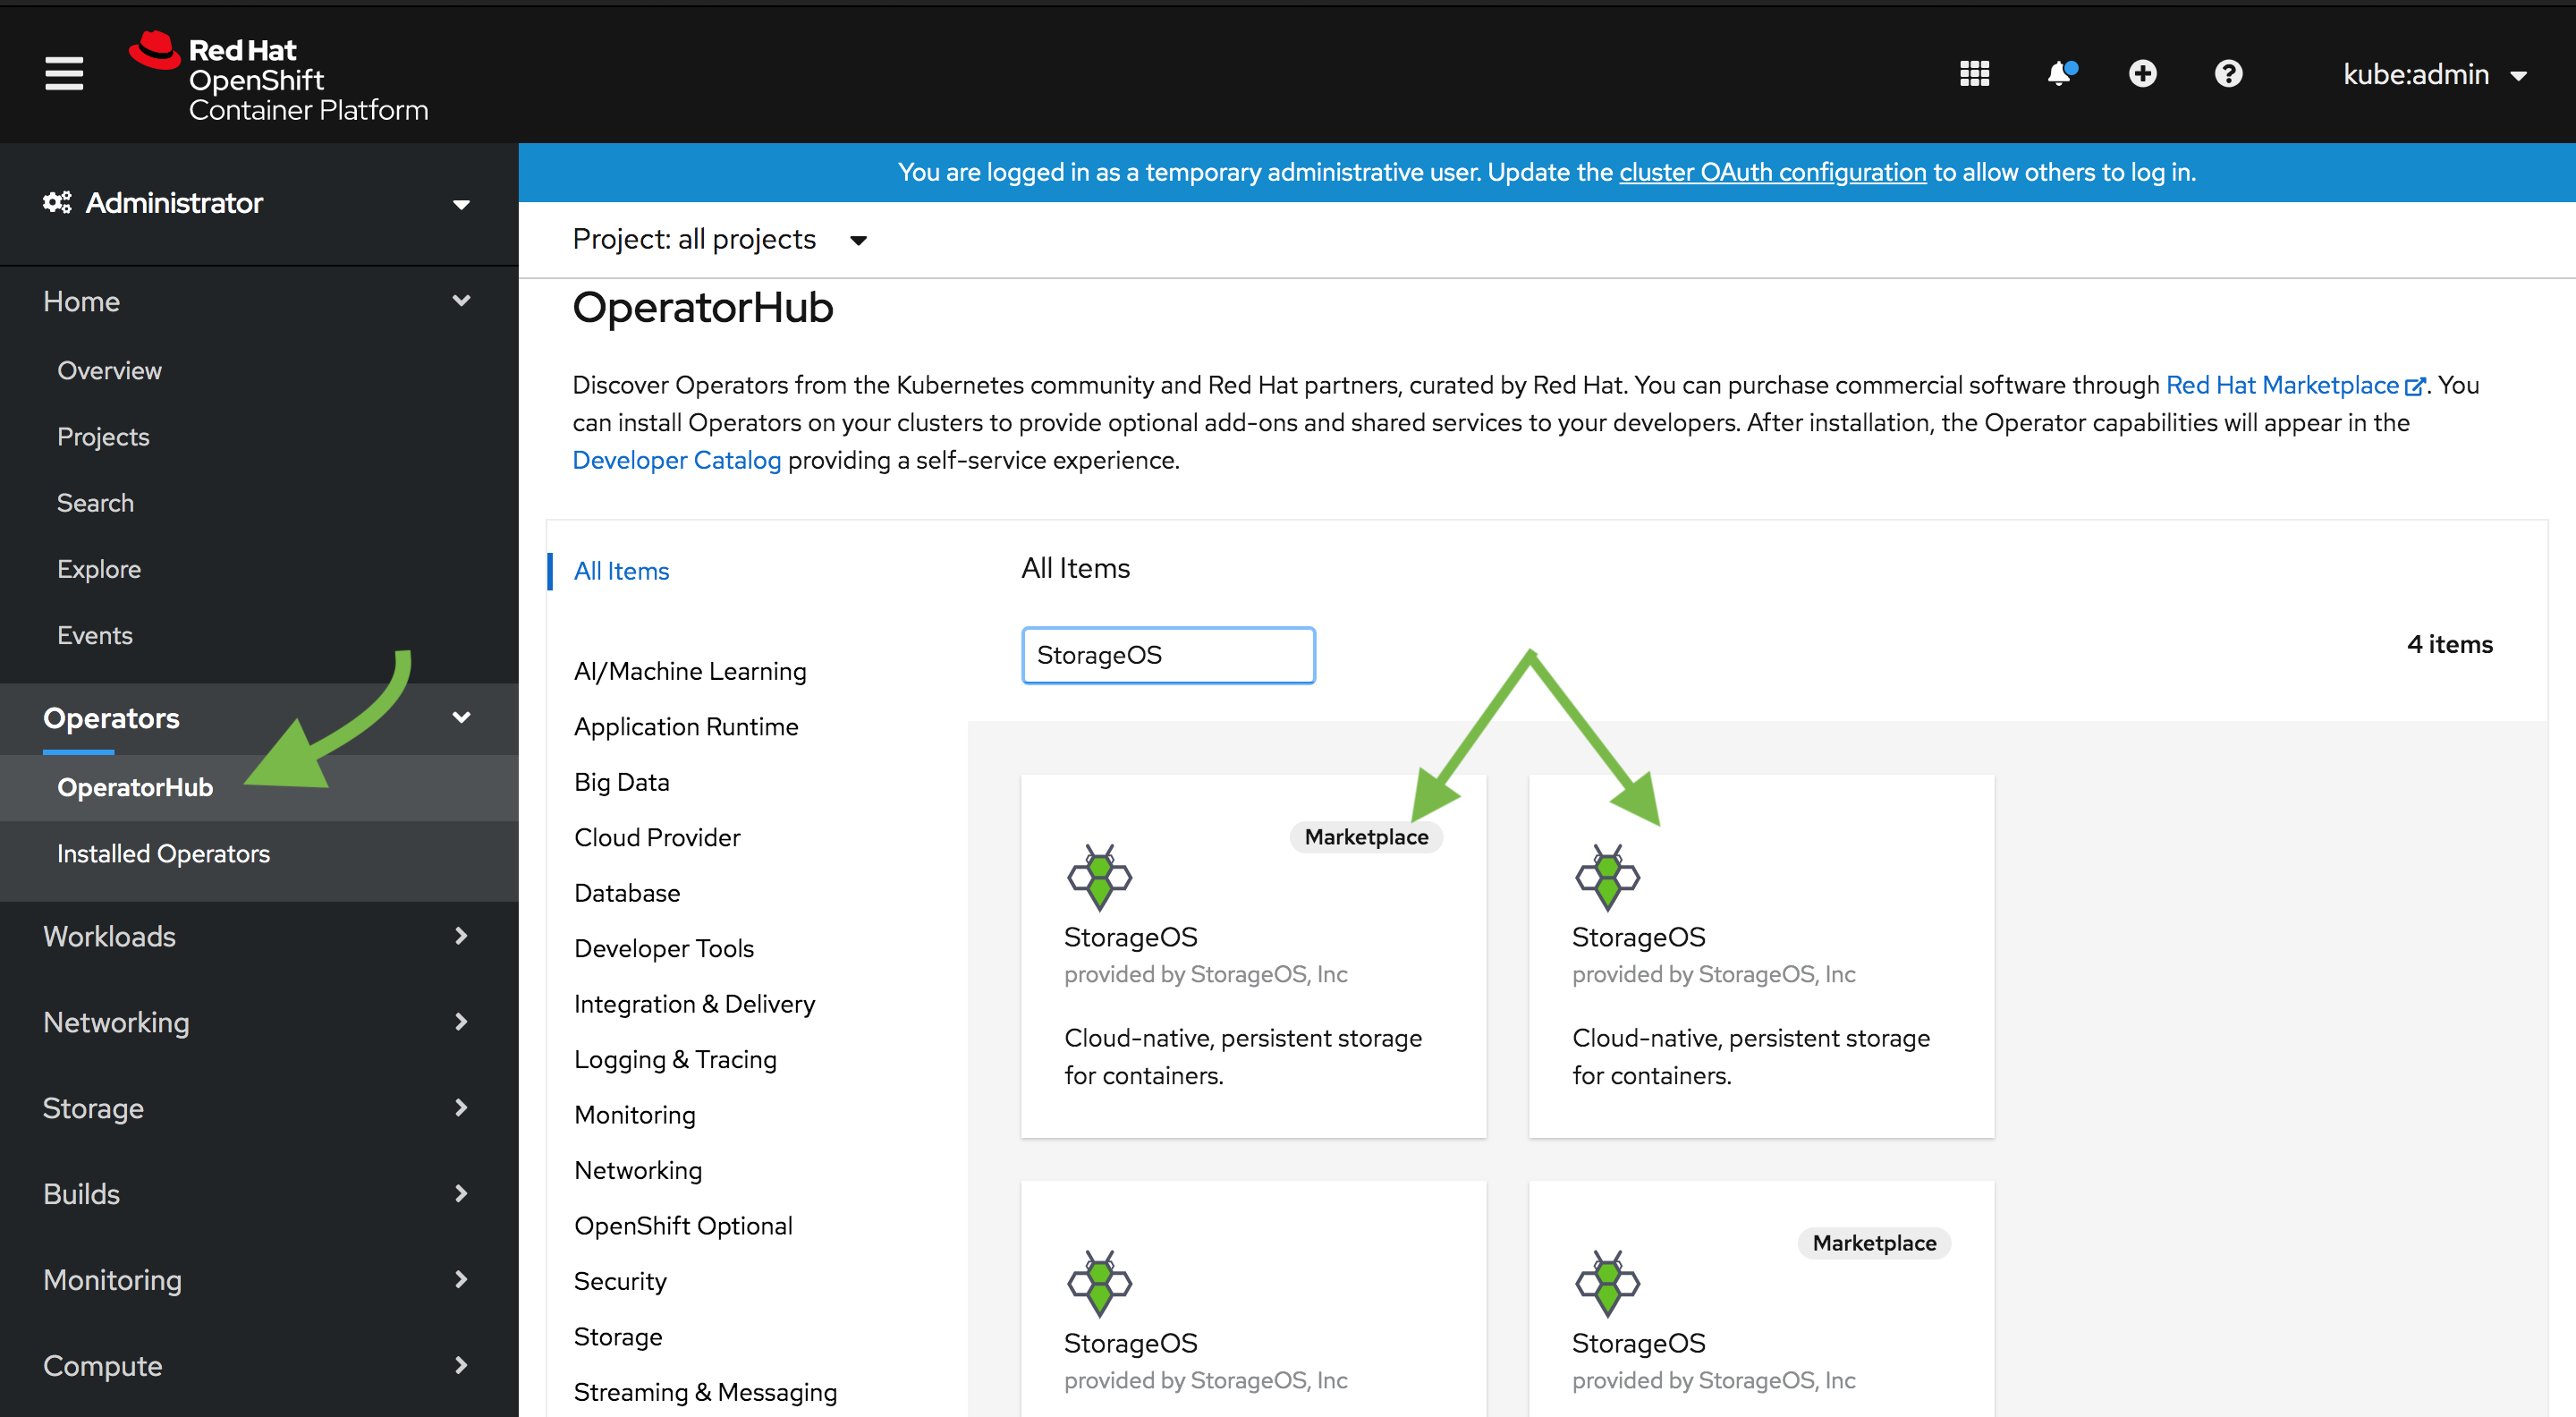
Choose between using the RedHat Market Place or the Community Operators installation.
-
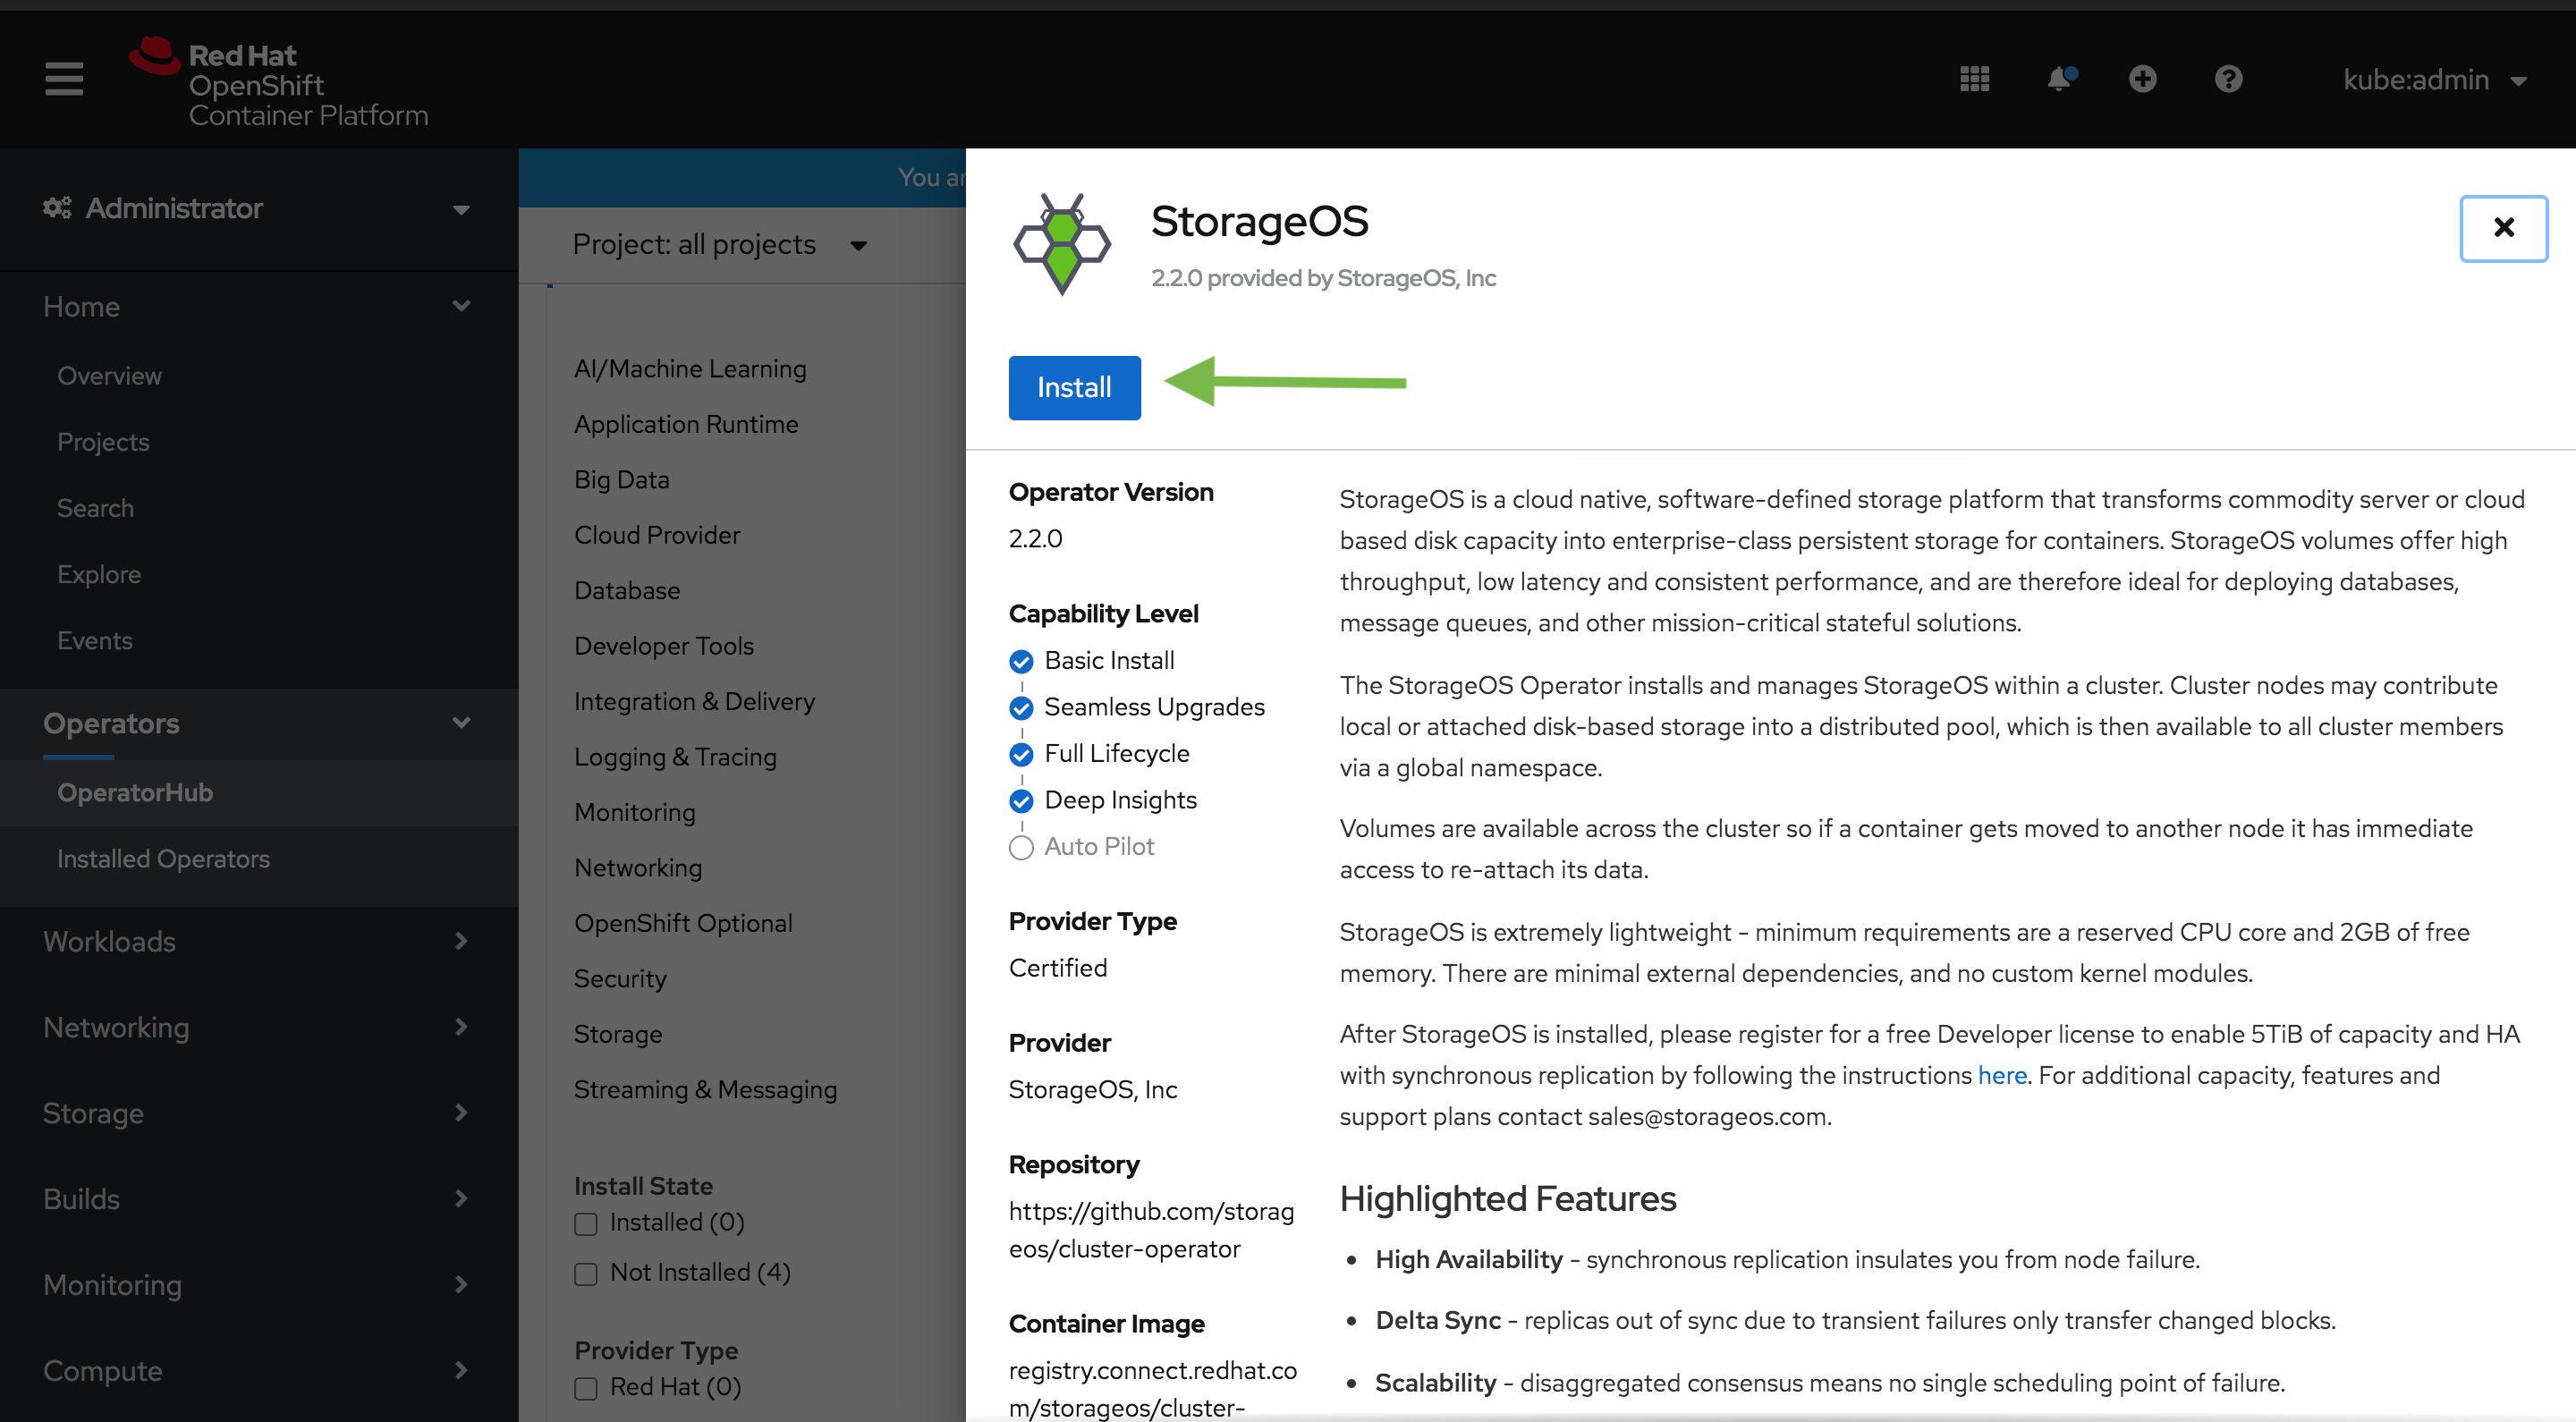
Select StorageOS and click install
-
Select the install options
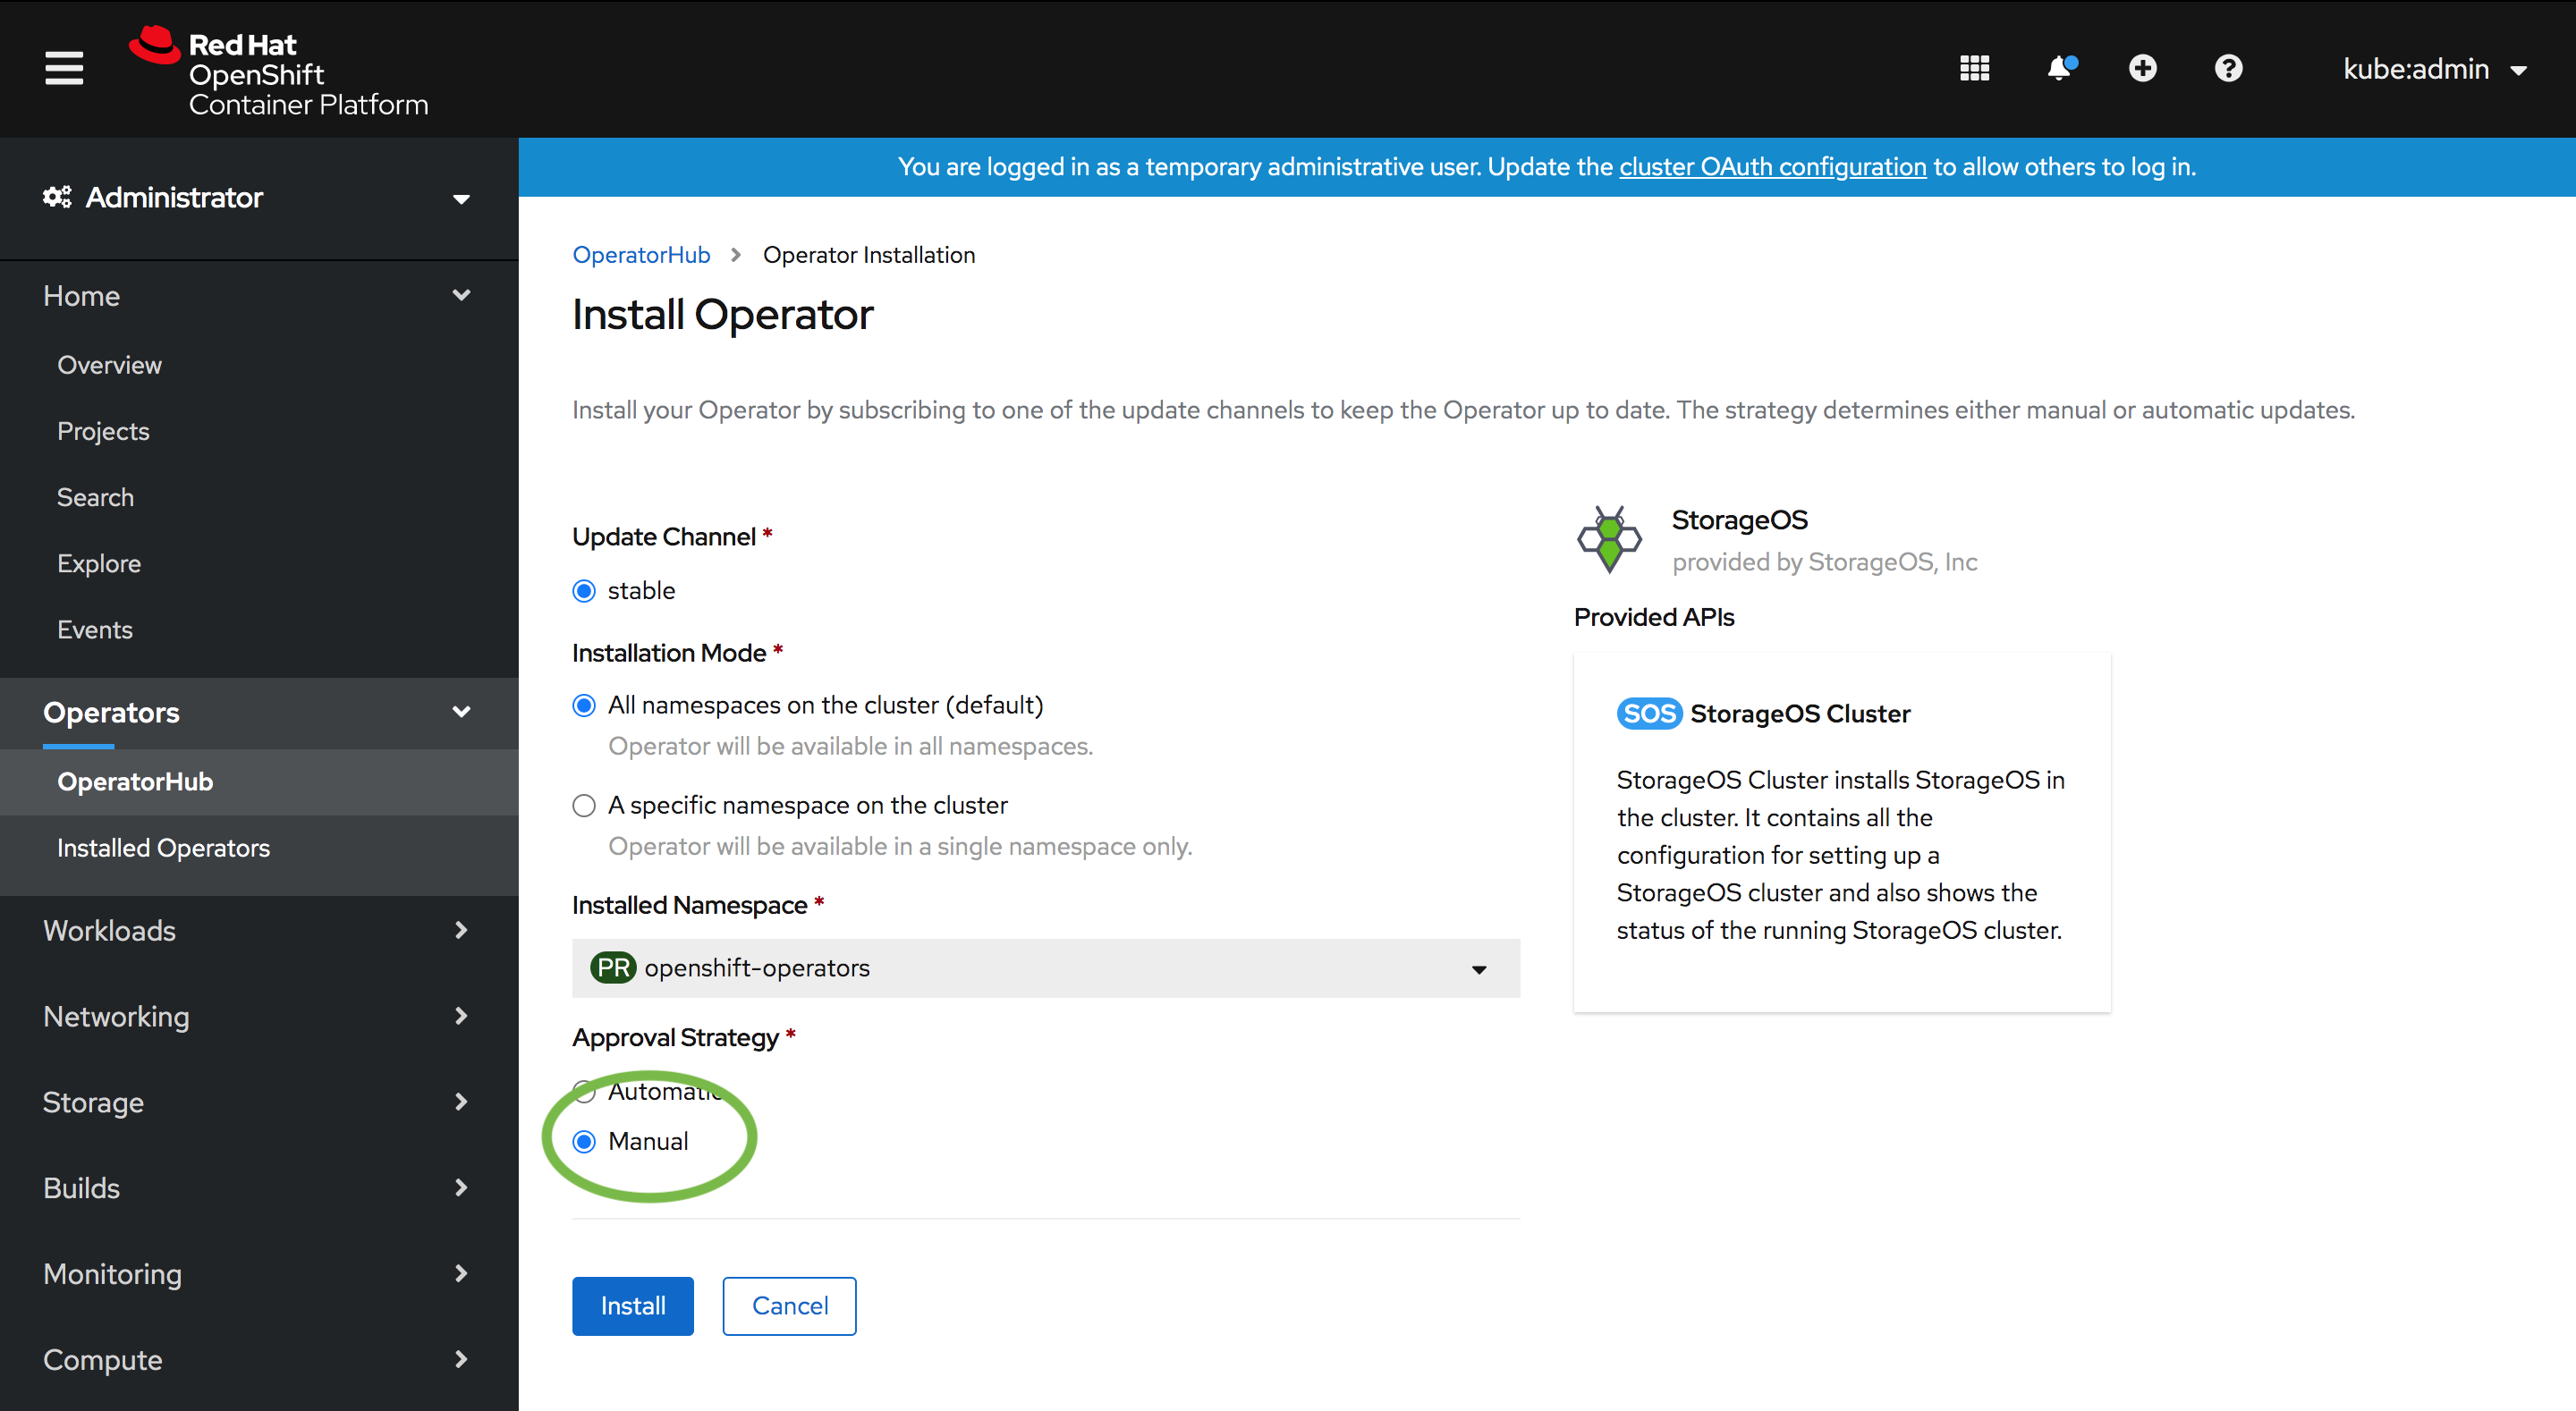
Make sure the
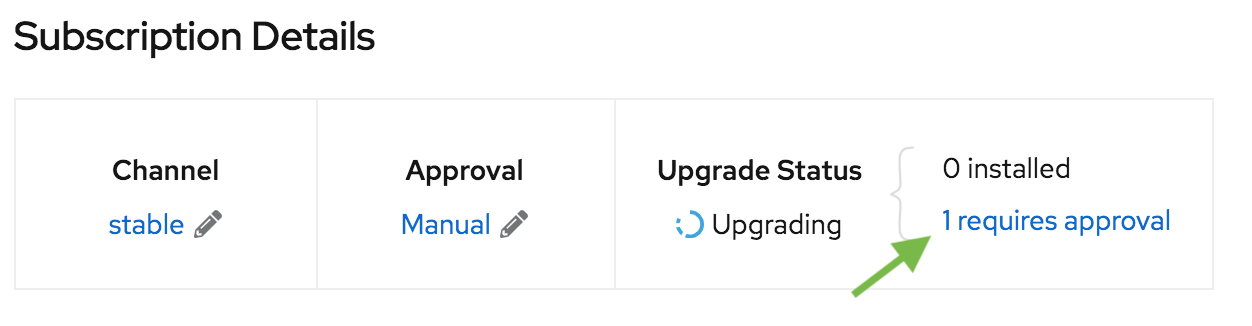
Approval Strategyis set to Manual. So the StorageOS Operator doesn’t upgrade versions without explicit approval. -
Start the approval procedure
-
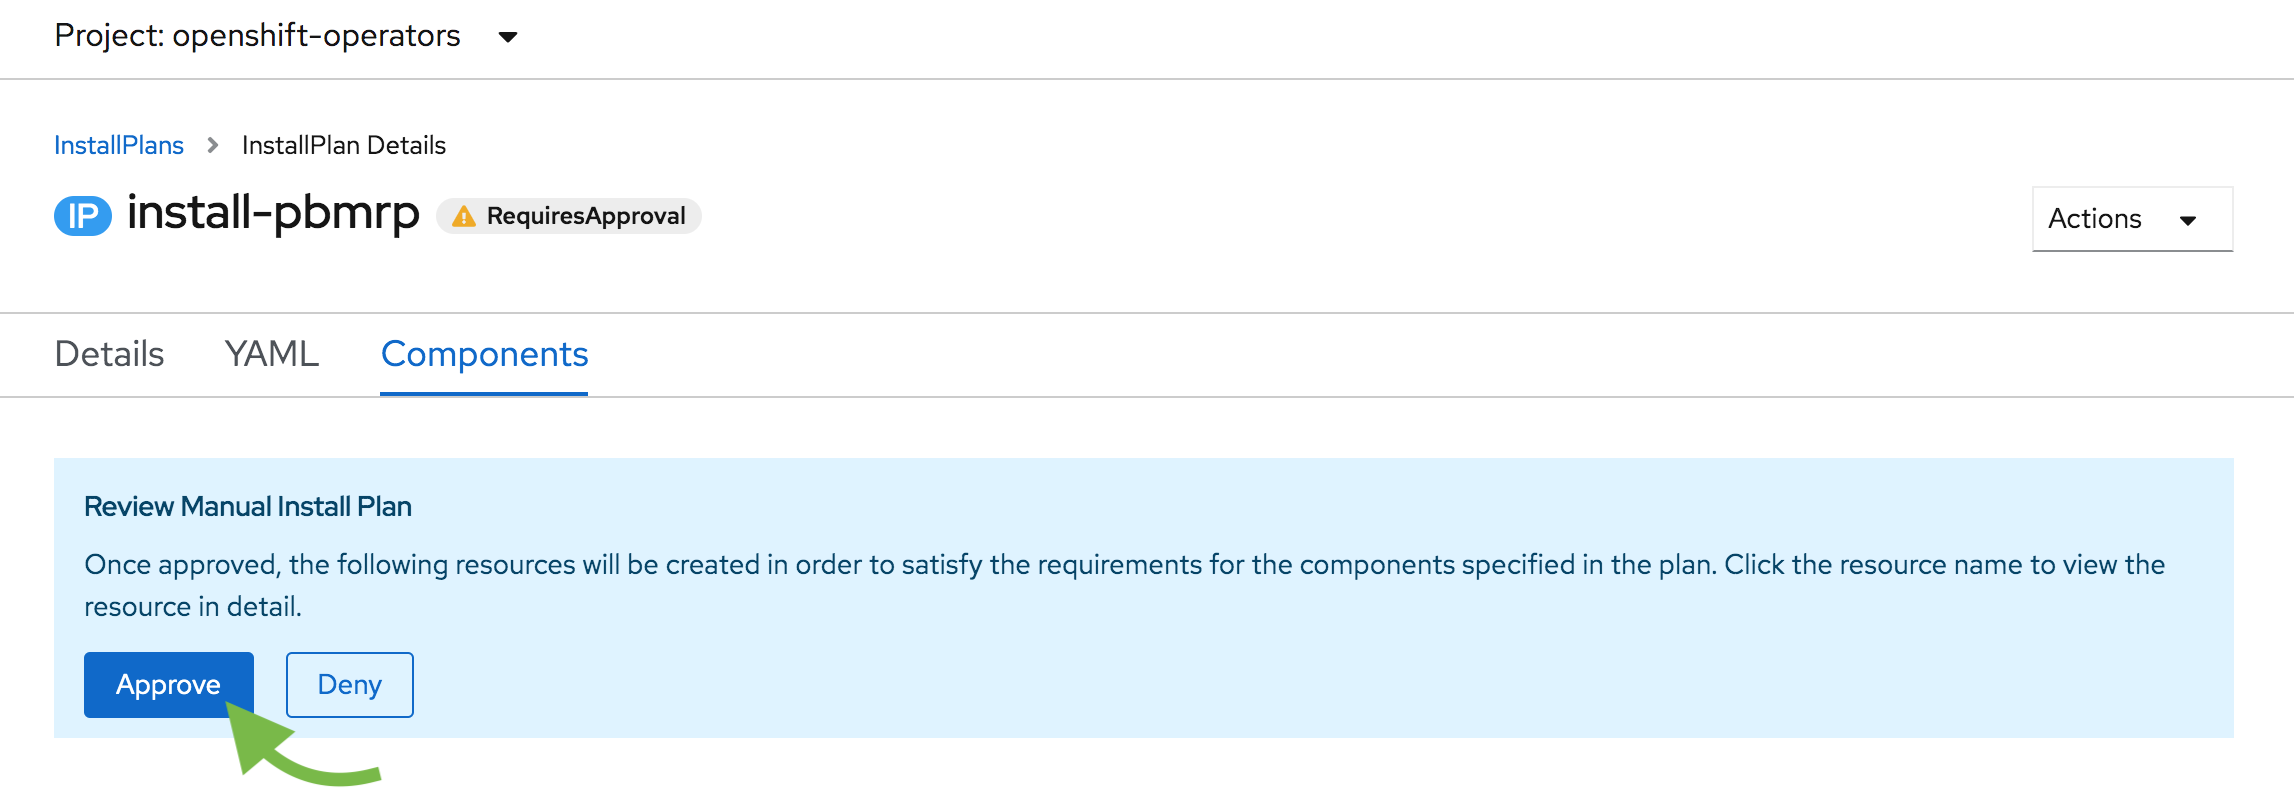
Follow the approval link
-
Approve the installation
-
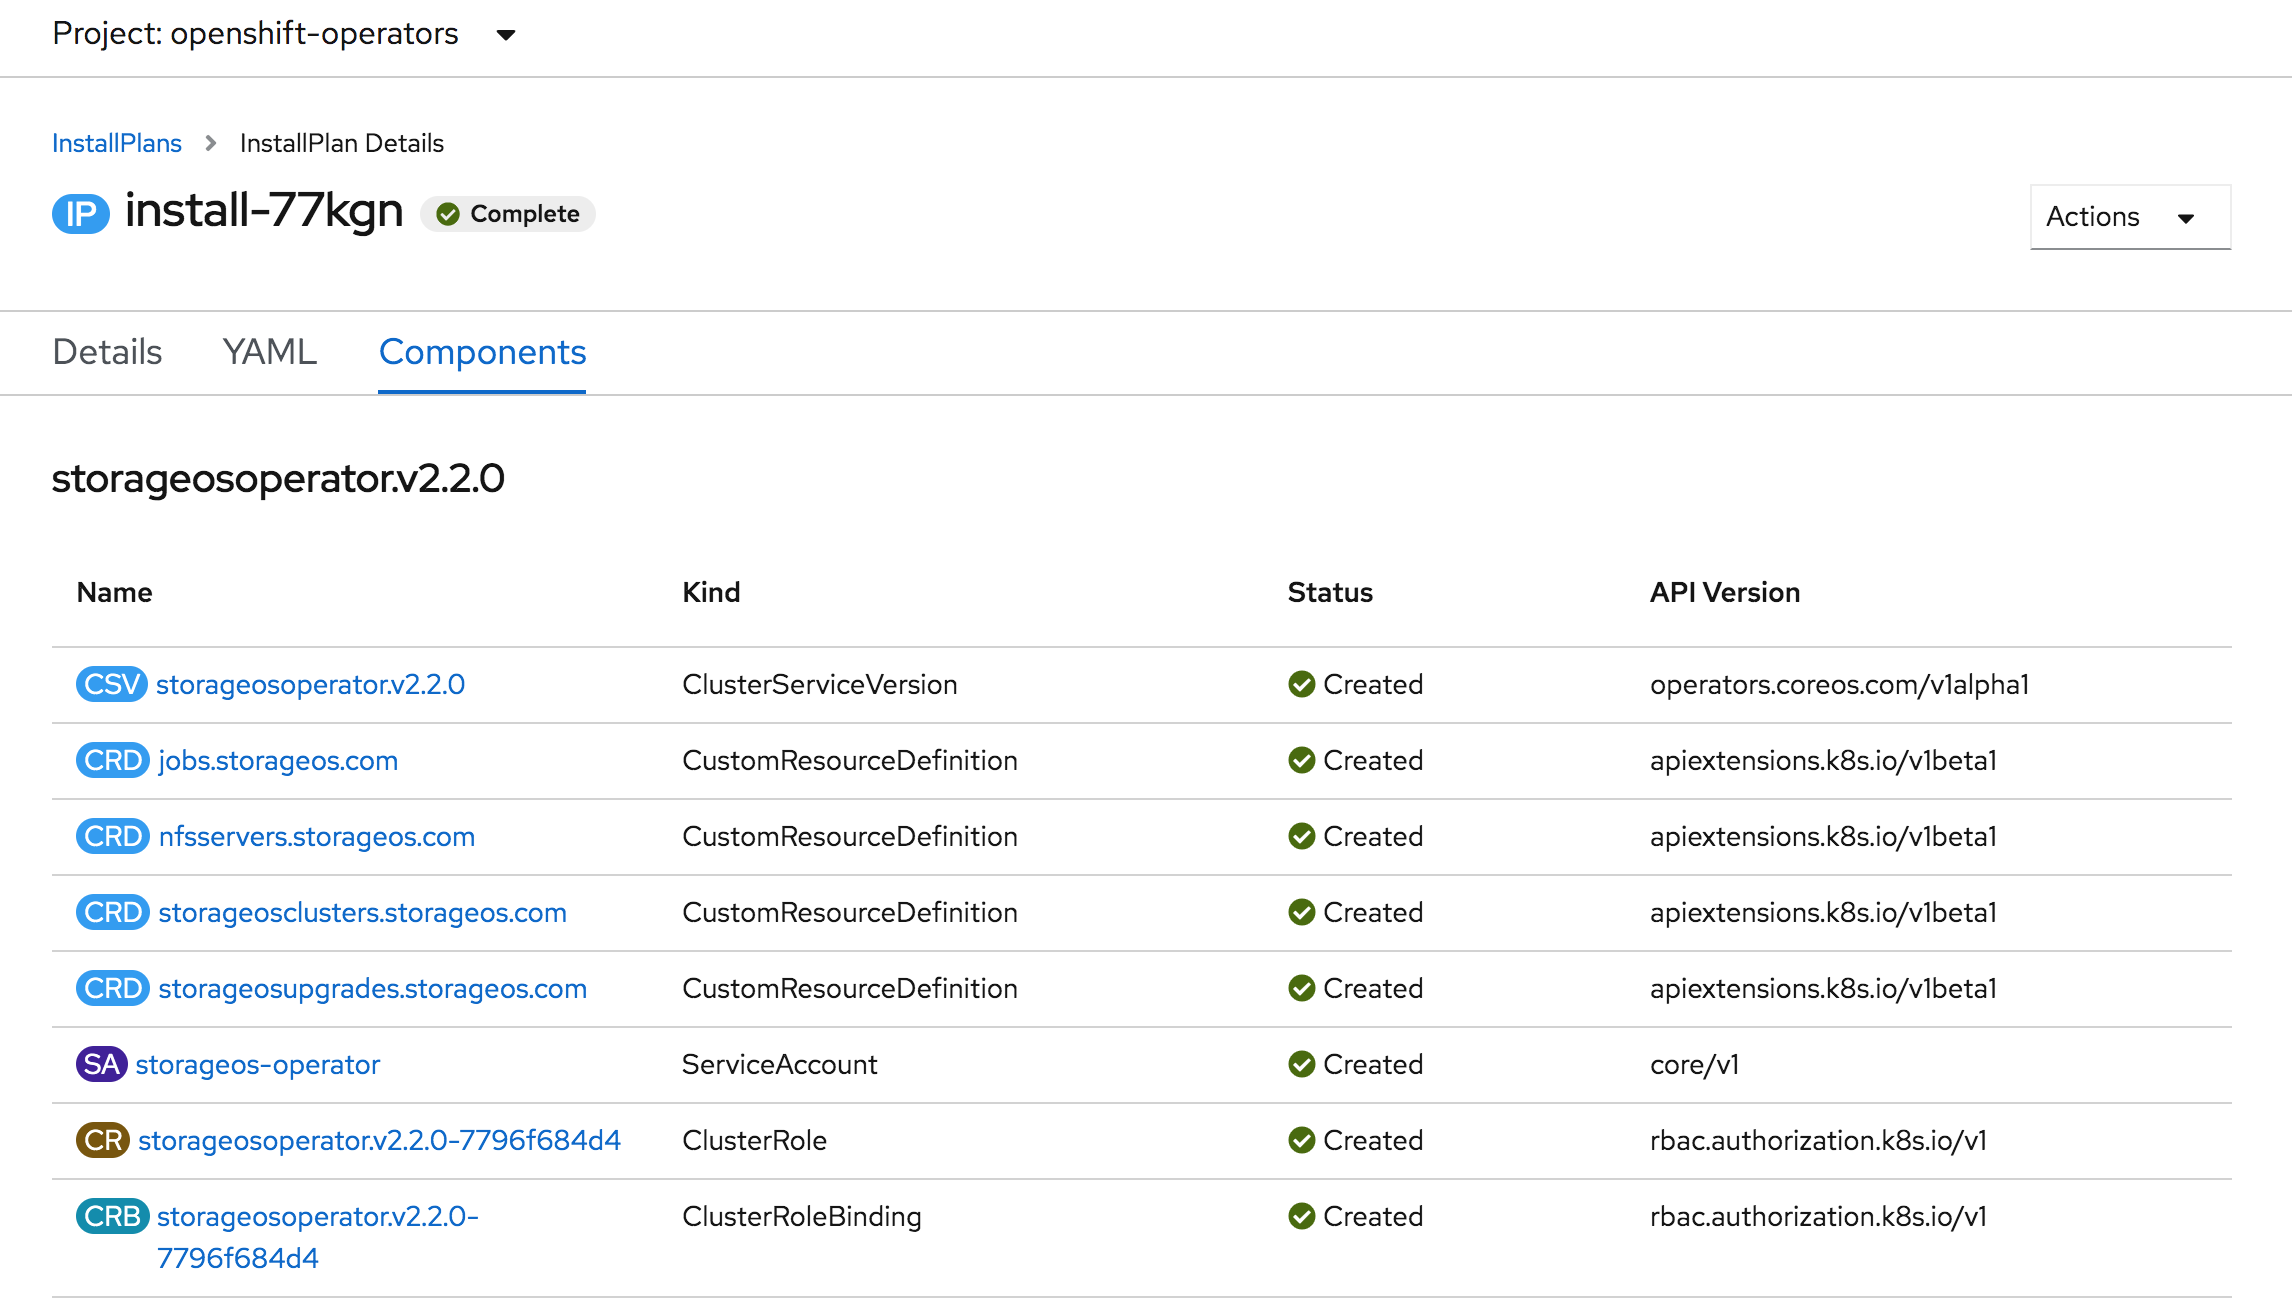
The StorageOS Cluster Operator is installed along the required CRDs
-
Create a Secret in the
openshift-operatorsproject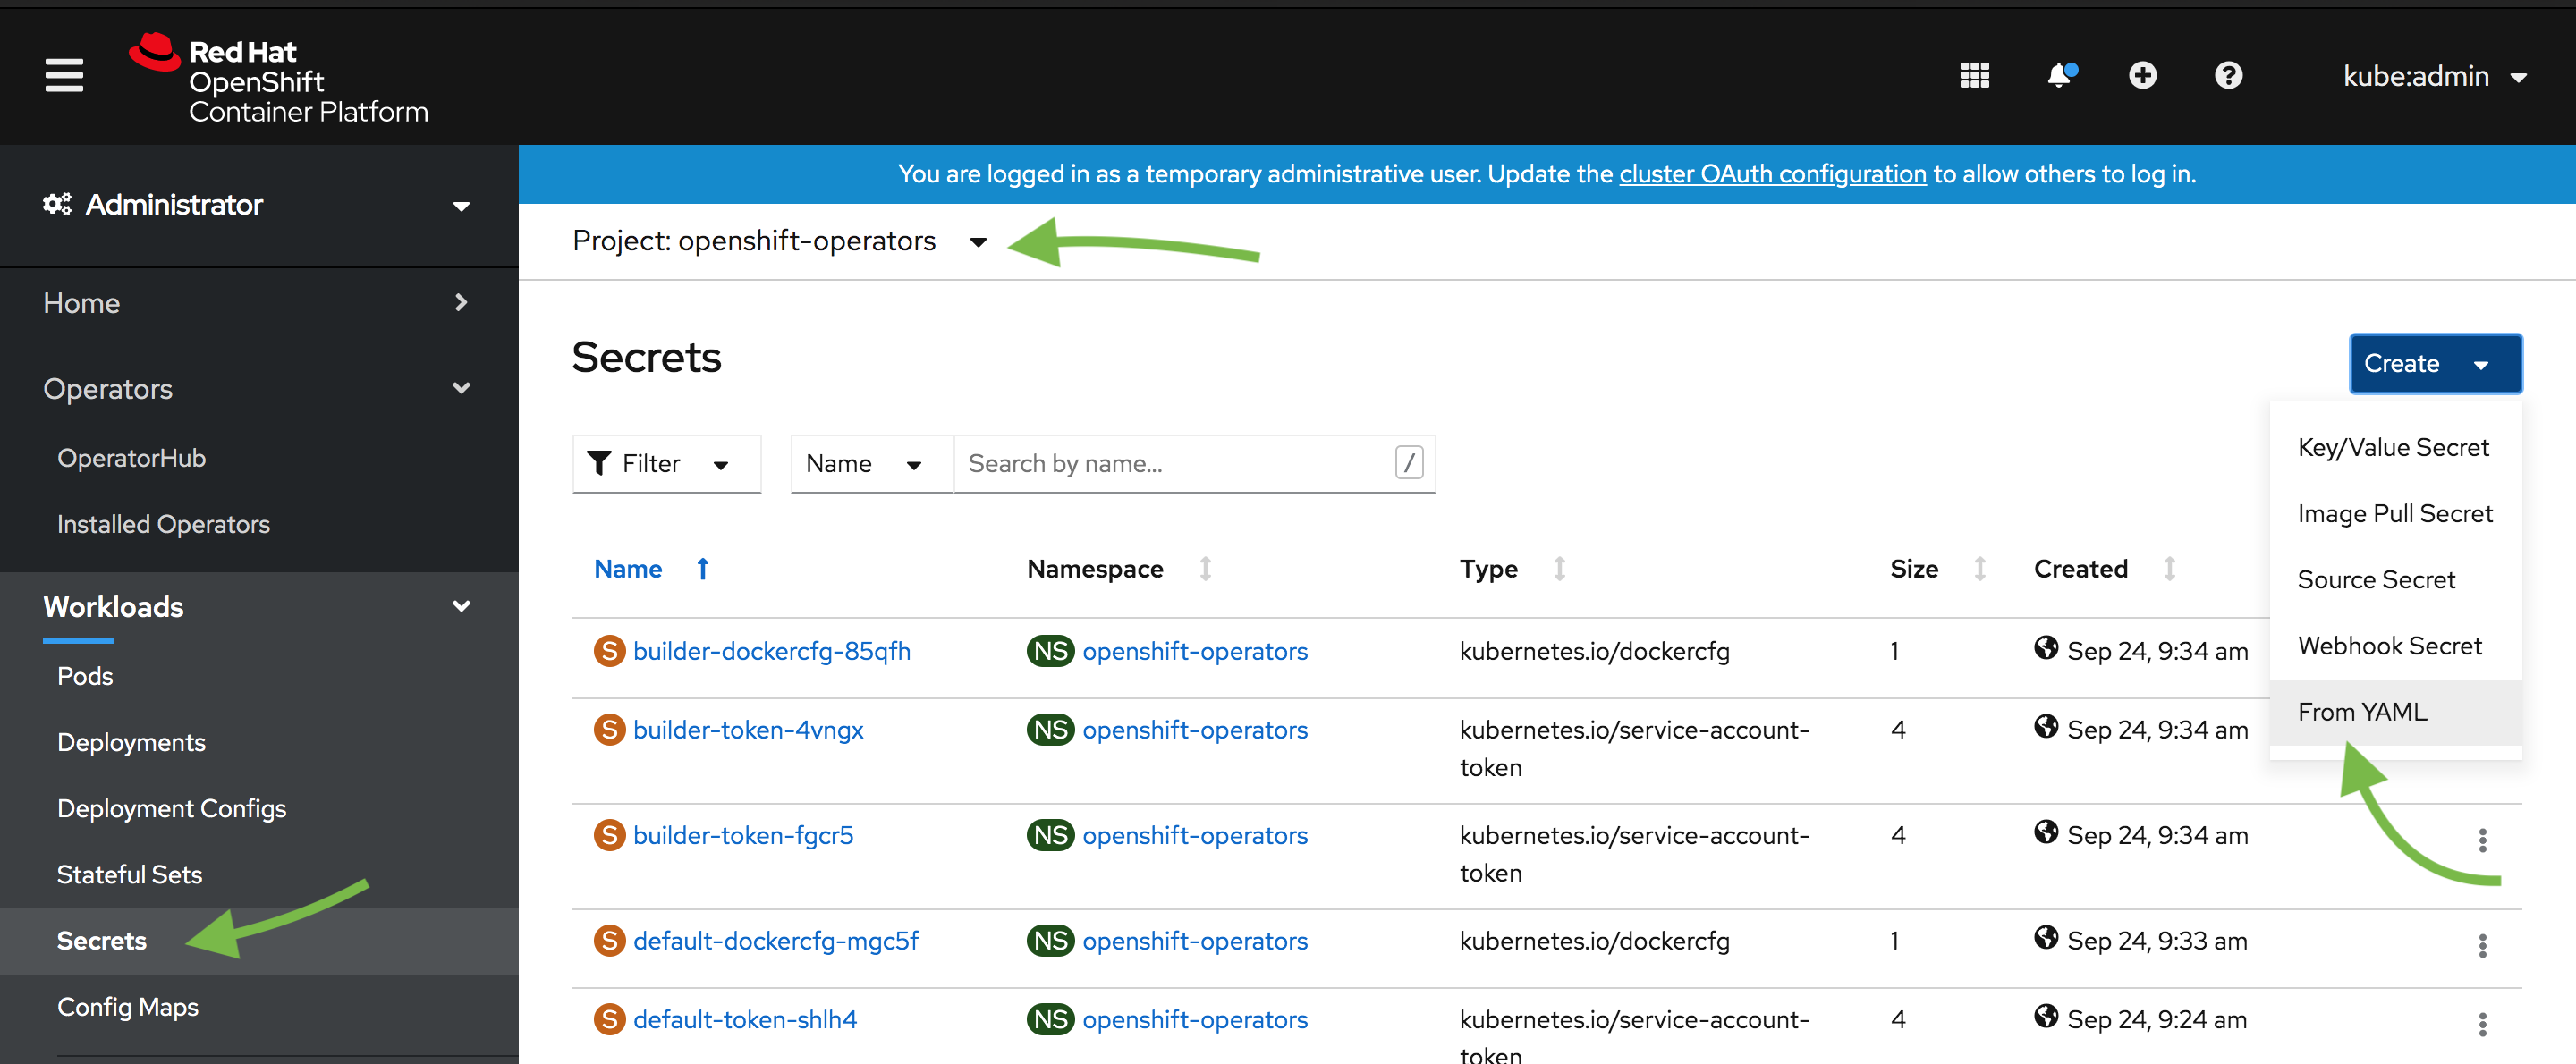
-
Use the YAML options to create a secret containing the
apiUsernameand anapiPasswordkey. The username and password defined in the secret will be used to authenticate when using the StorageOS CLI and GUI. For the communication between StorageOS and OpenShift, the CSI credentialscsiProvisionUsername,csiProvisionPassword,csiControllerPublishUsername,csiControllerPublishPassword,csiNodePublishUsername,csiNodePublishPasswordare needed. Take note of which project you created the secret in.Input the Secret as YAML for simplicity.
apiVersion: v1
kind: Secret
metadata:
  name: storageos-api
  namespace: openshift-operators
type: "kubernetes.io/storageos"
data:
  # echo -n '<secret>' | base64
  apiUsername: c3RvcmFnZW9z
  apiPassword: c3RvcmFnZW9z
  # CSI Credentials
  csiProvisionUsername: c3RvcmFnZW9z
  csiProvisionPassword: c3RvcmFnZW9z
  csiControllerPublishUsername: c3RvcmFnZW9z
  csiControllerPublishPassword: c3RvcmFnZW9z
  csiNodePublishUsername: c3RvcmFnZW9z
  csiNodePublishPassword: c3RvcmFnZW9z
  csiControllerExpandUsername: c3RvcmFnZW9z
  csiControllerExpandPassword: c3RvcmFnZW9z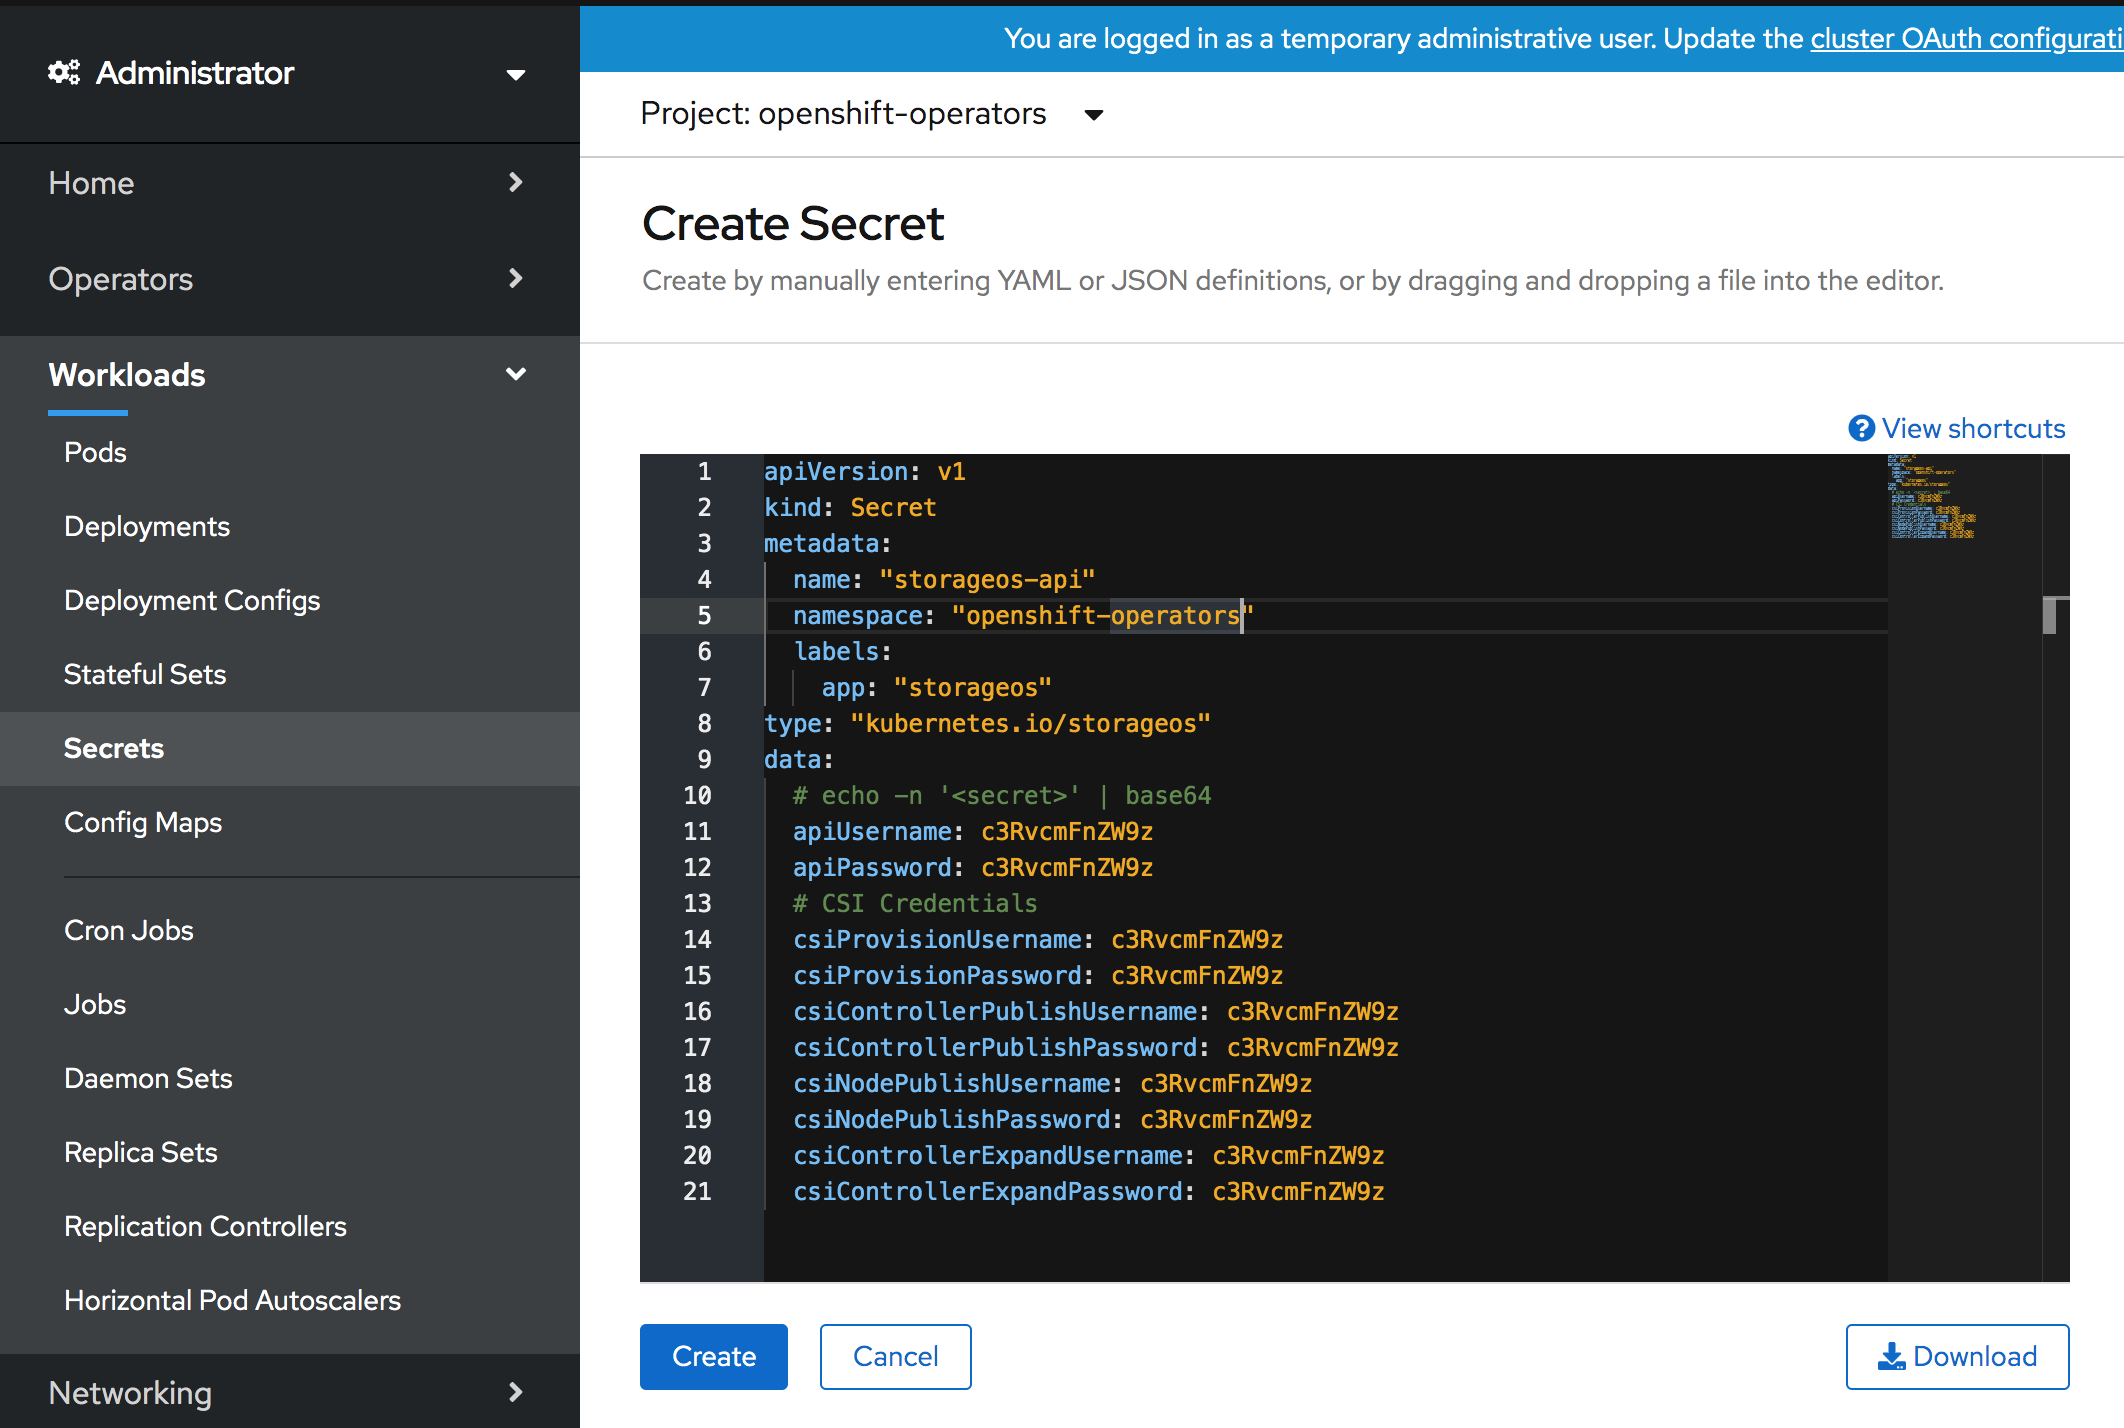
-
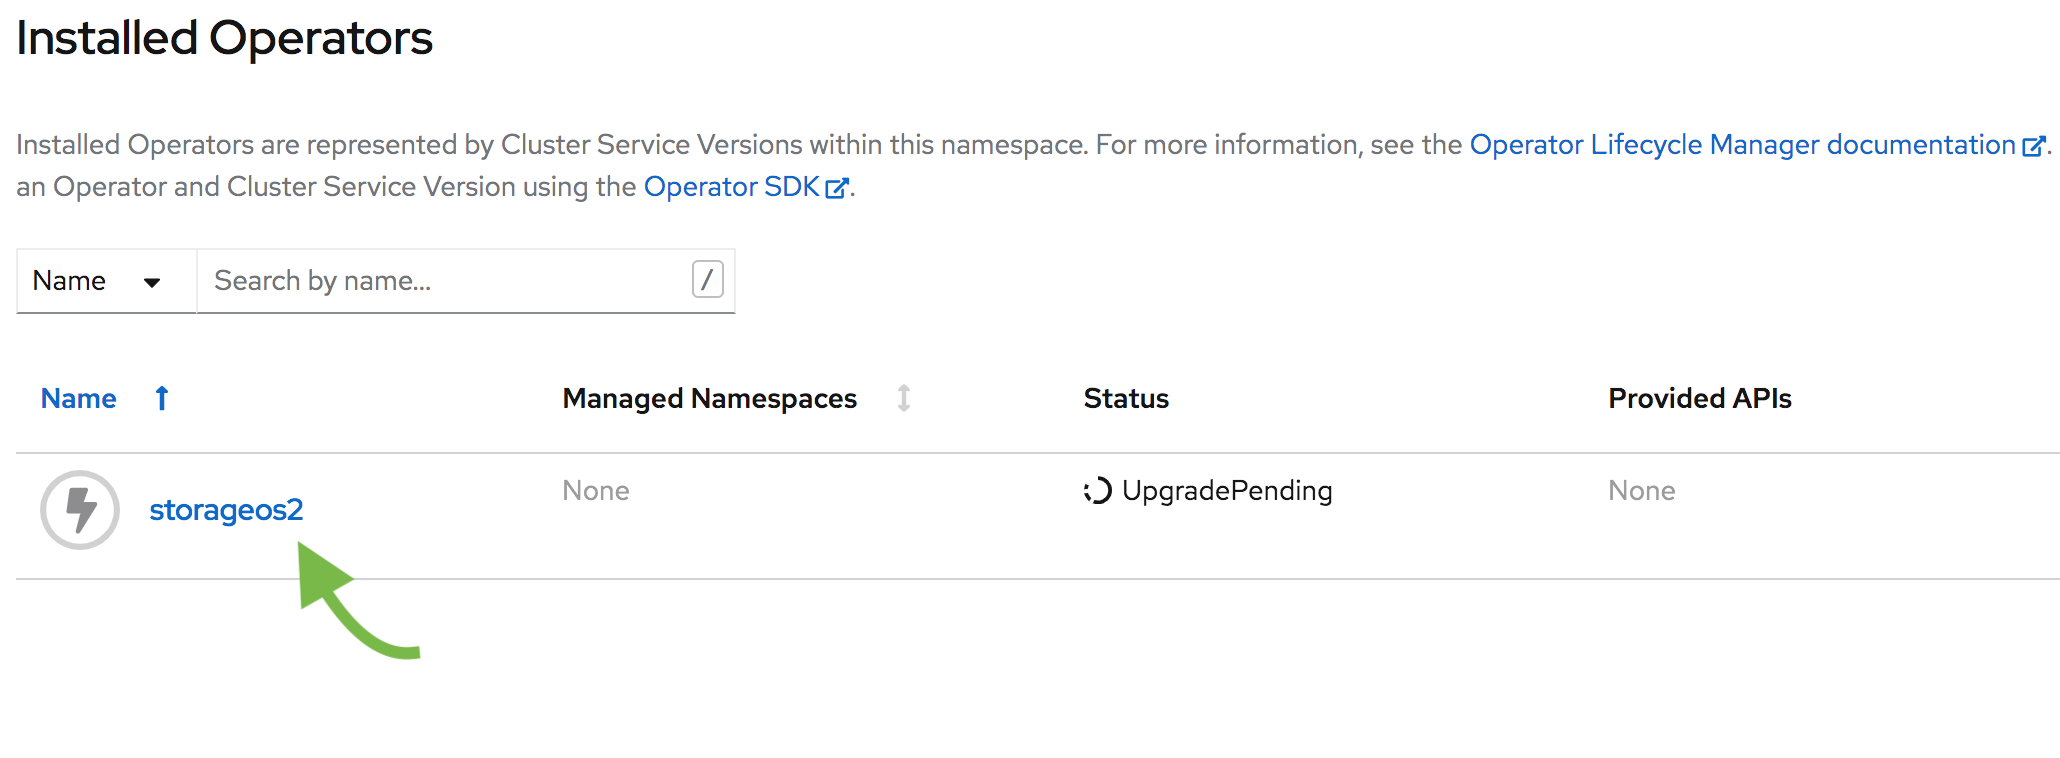
Go to the “Installed Operators”
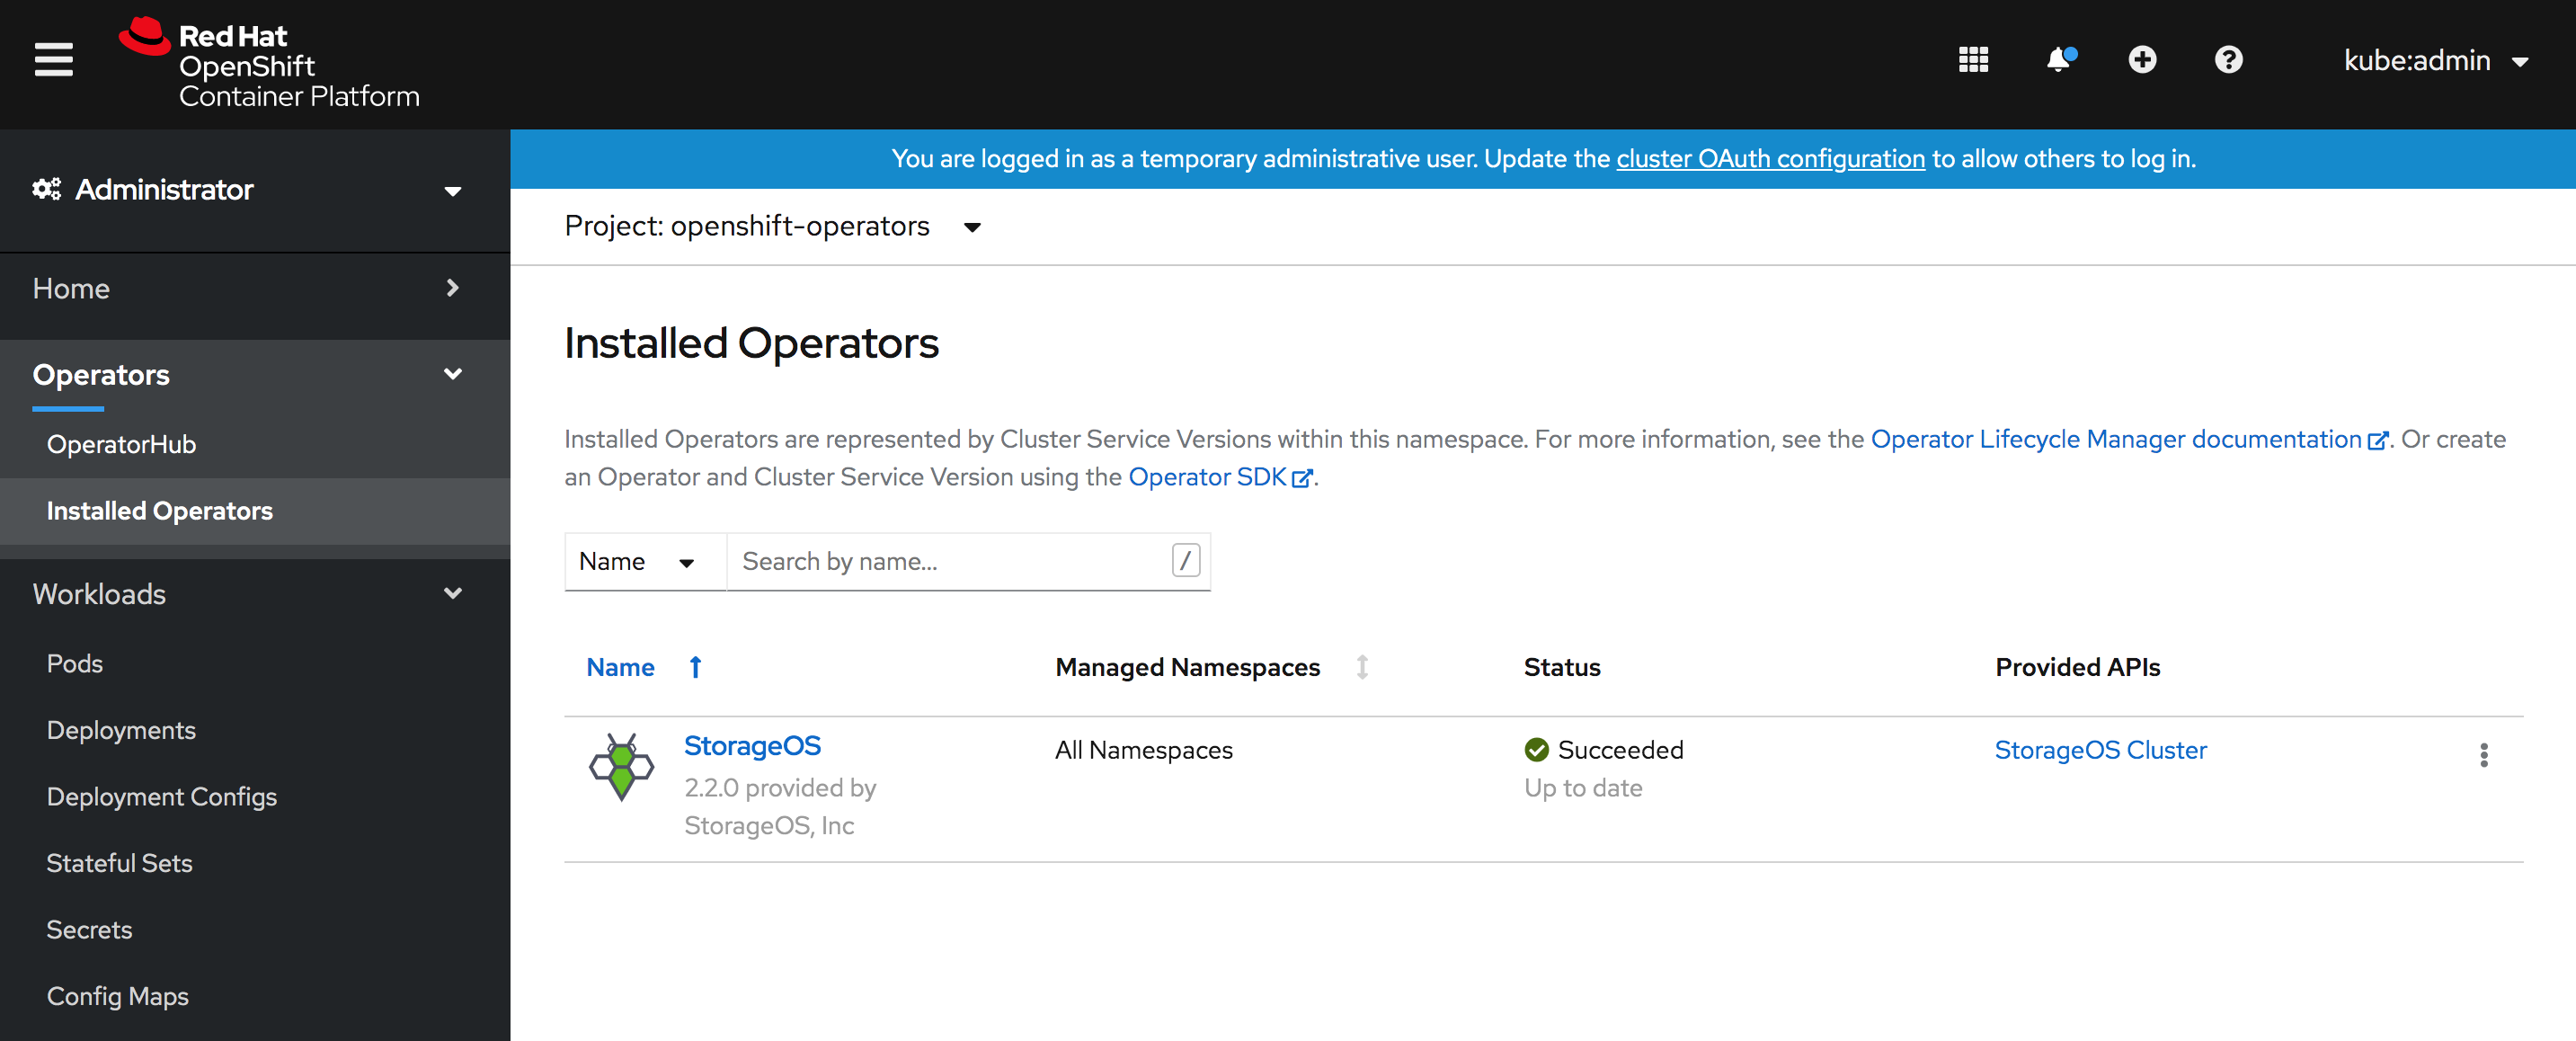
Verify that the StorageOS Cluster Operator is installed
-
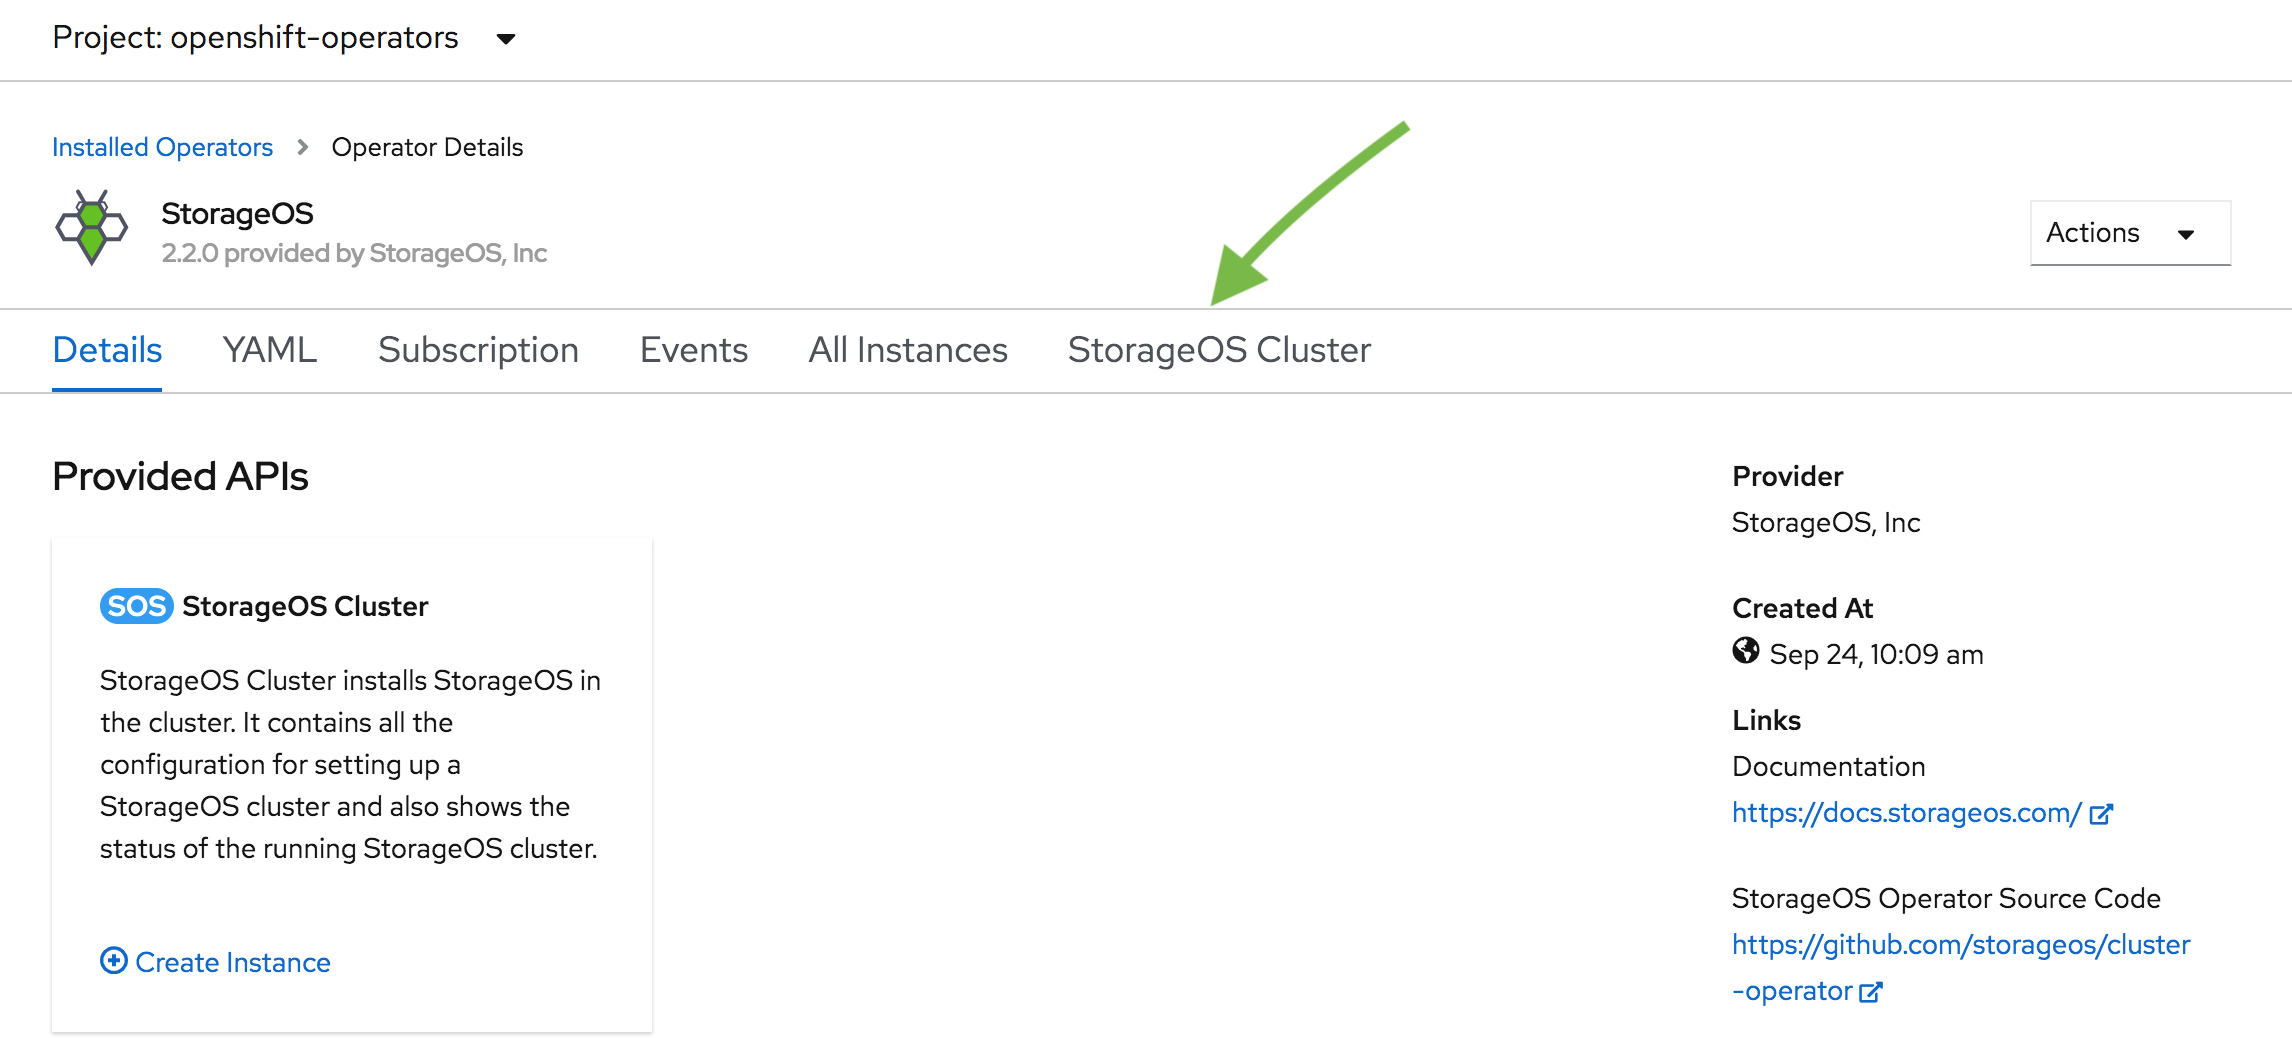
Go to the “StorageOS Cluster” section
-
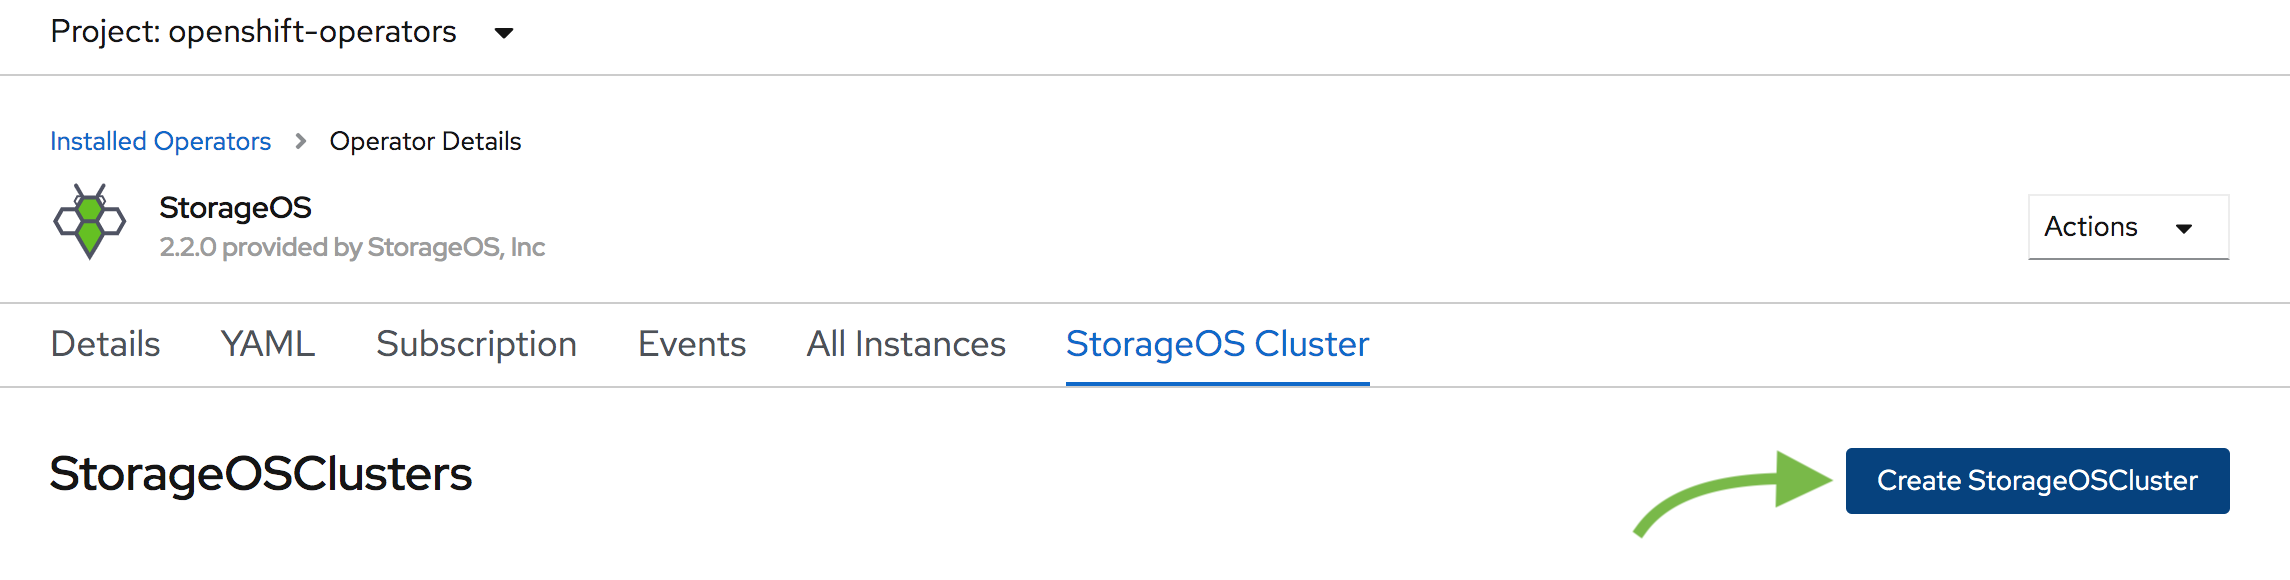
Create the StorageOS Cluster
A StorageOS Cluster is defined using a Custom Resource Definition
-
Create the Custom Resource
The StorageOS cluster resource describes the StorageOS cluster that will be created. Parameters such as the
secretRefName, thesecretRefNamespaceand thekvBackend.addressare mandatory.Additional
specparameters are available on the Cluster Operator configuration page.apiVersion: "storageos.com/v1" kind: StorageOSCluster metadata: name: storageos namespace: openshift-operators spec: # StorageOS Pods are in kube-system by default secretRefName: "storageos-api" # Reference the Secret created in the previous step secretRefNamespace: "openshift-operators" # Namespace of the Secret created in the previous step k8sDistro: "openshift" kvBackend: address: 'storageos-etcd-client.etcd:2379' # Example address, change for your etcd endpoint # address: '10.42.15.23:2379,10.42.12.22:2379,10.42.13.16:2379' # You can set ETCD server ips resources: requests: memory: "512Mi" cpu: 1 # nodeSelectorTerms: # - matchExpressions: # - key: "node-role.kubernetes.io/worker" # Compute node label will vary according to your installation # operator: In # values: # - "true"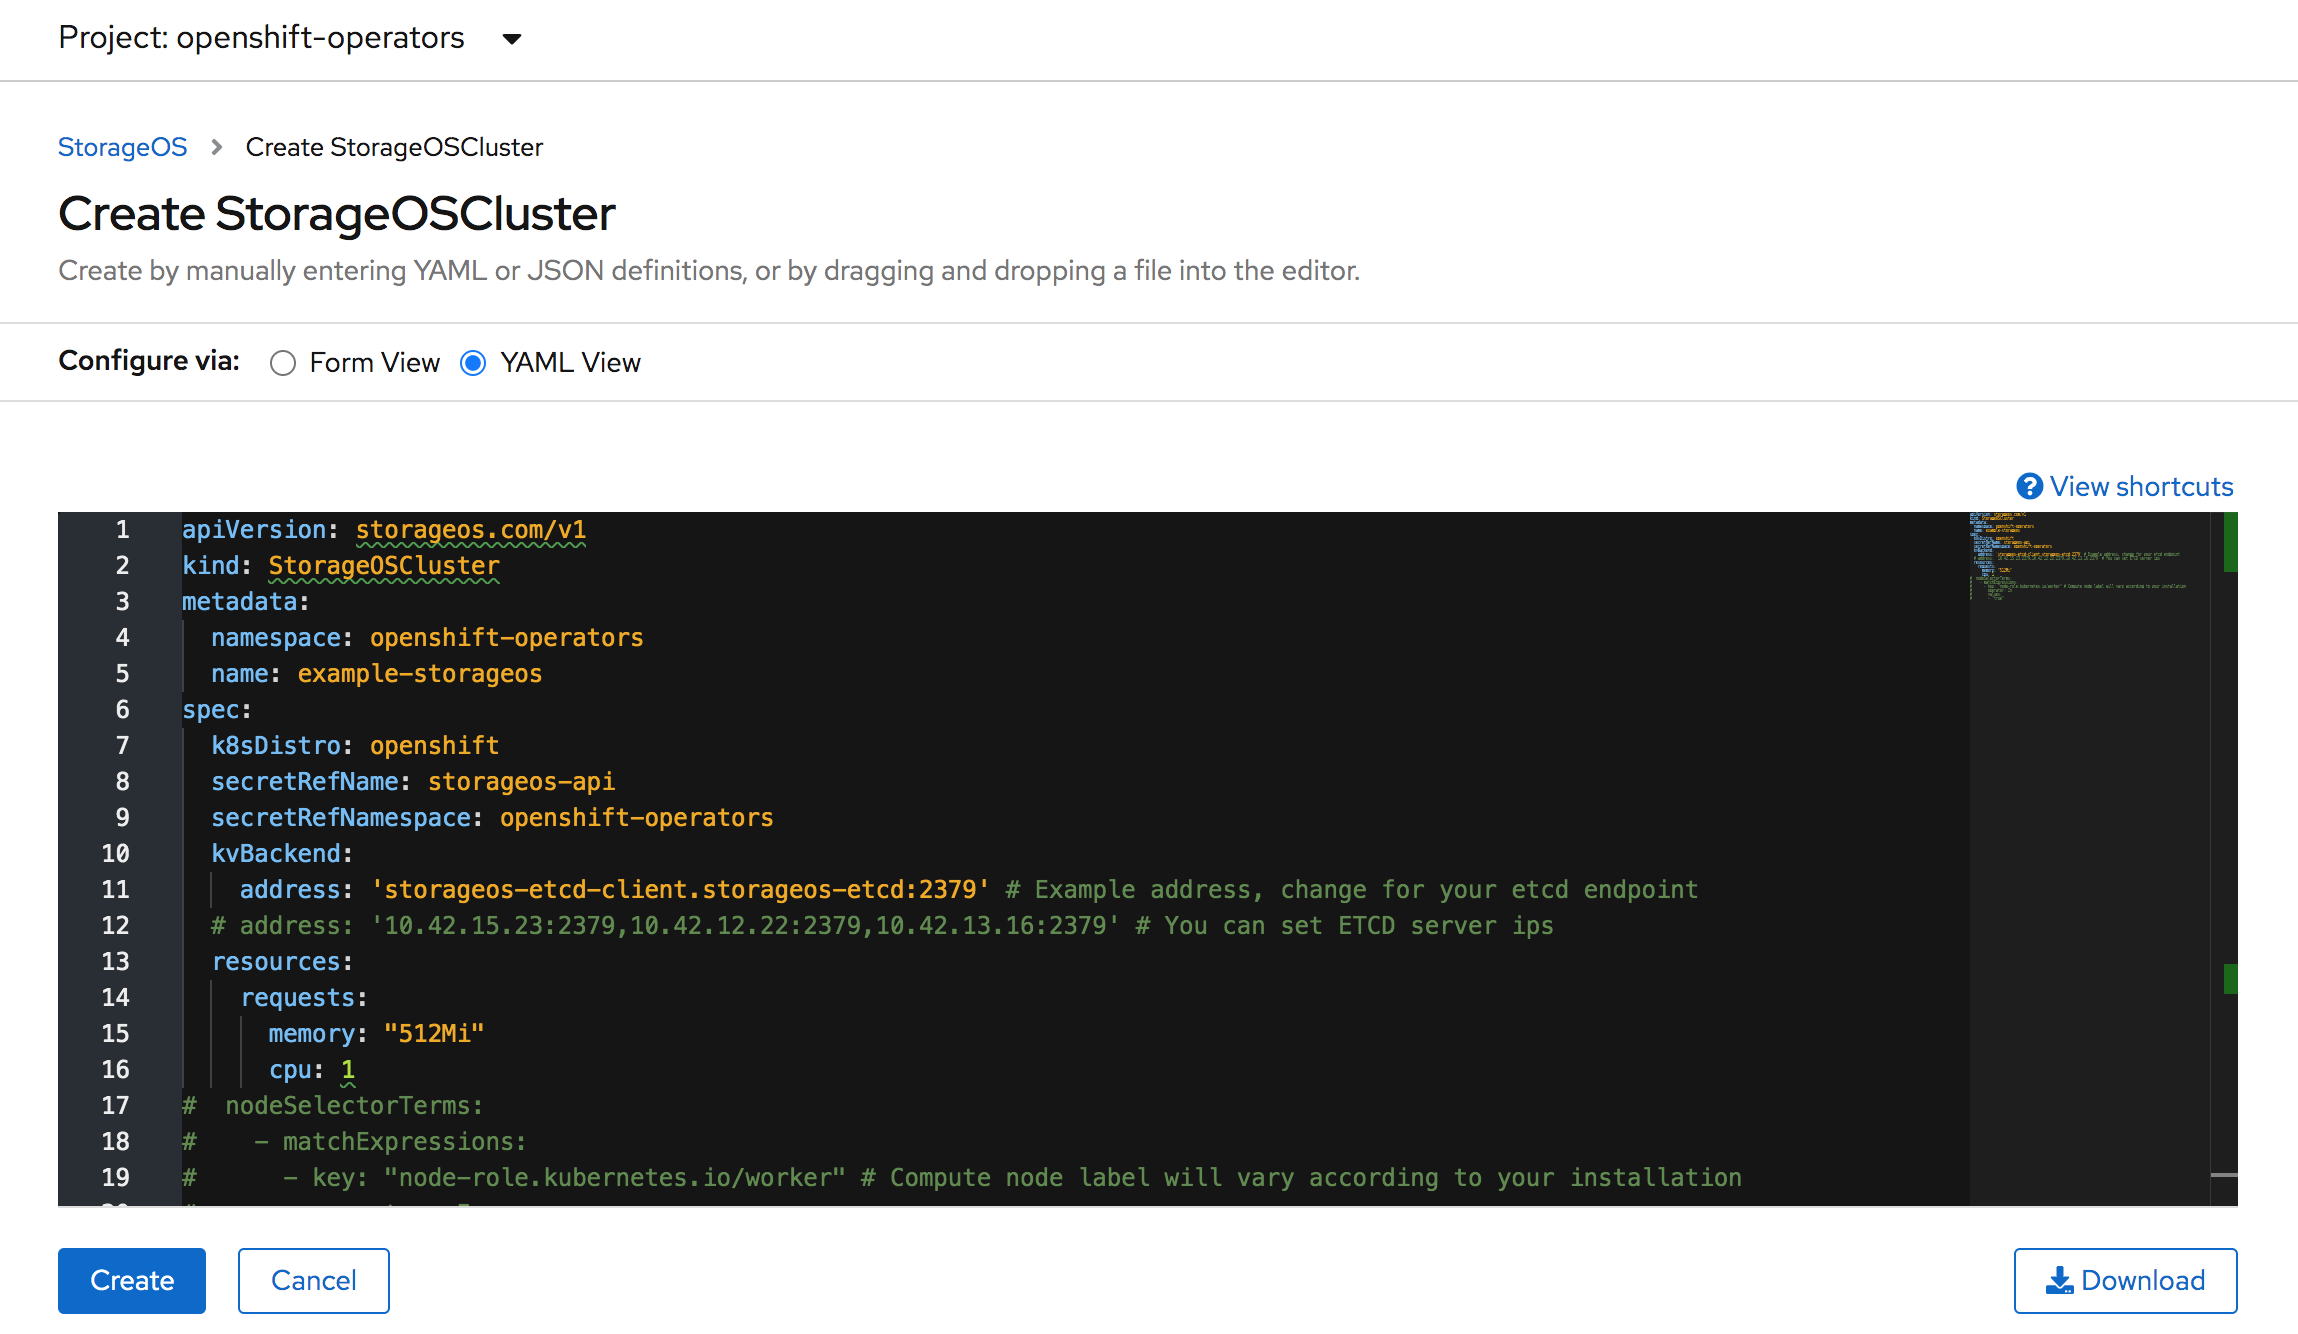
-
Verify that the StorageOS Cluster Resource enters a running state.
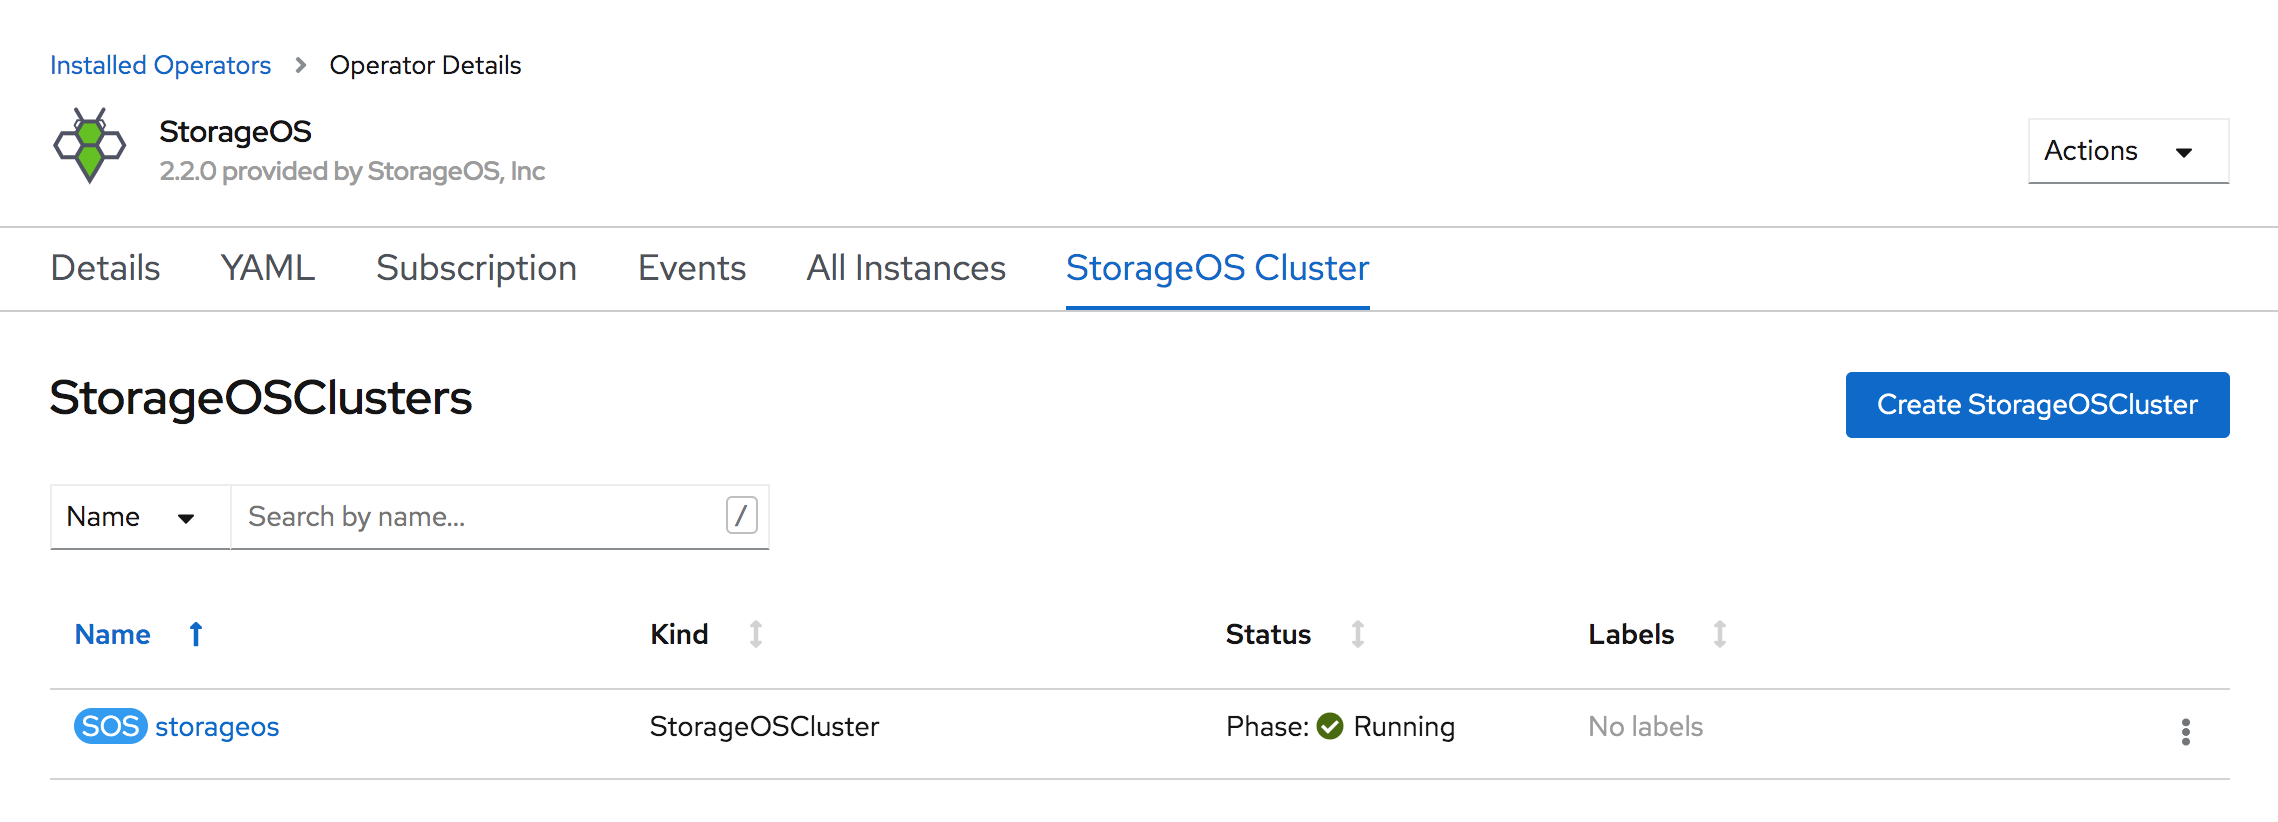
It can take up to a minute to report the StorageOS Pods ready
-
Check the StorageOS Pods in the
kube-systemproject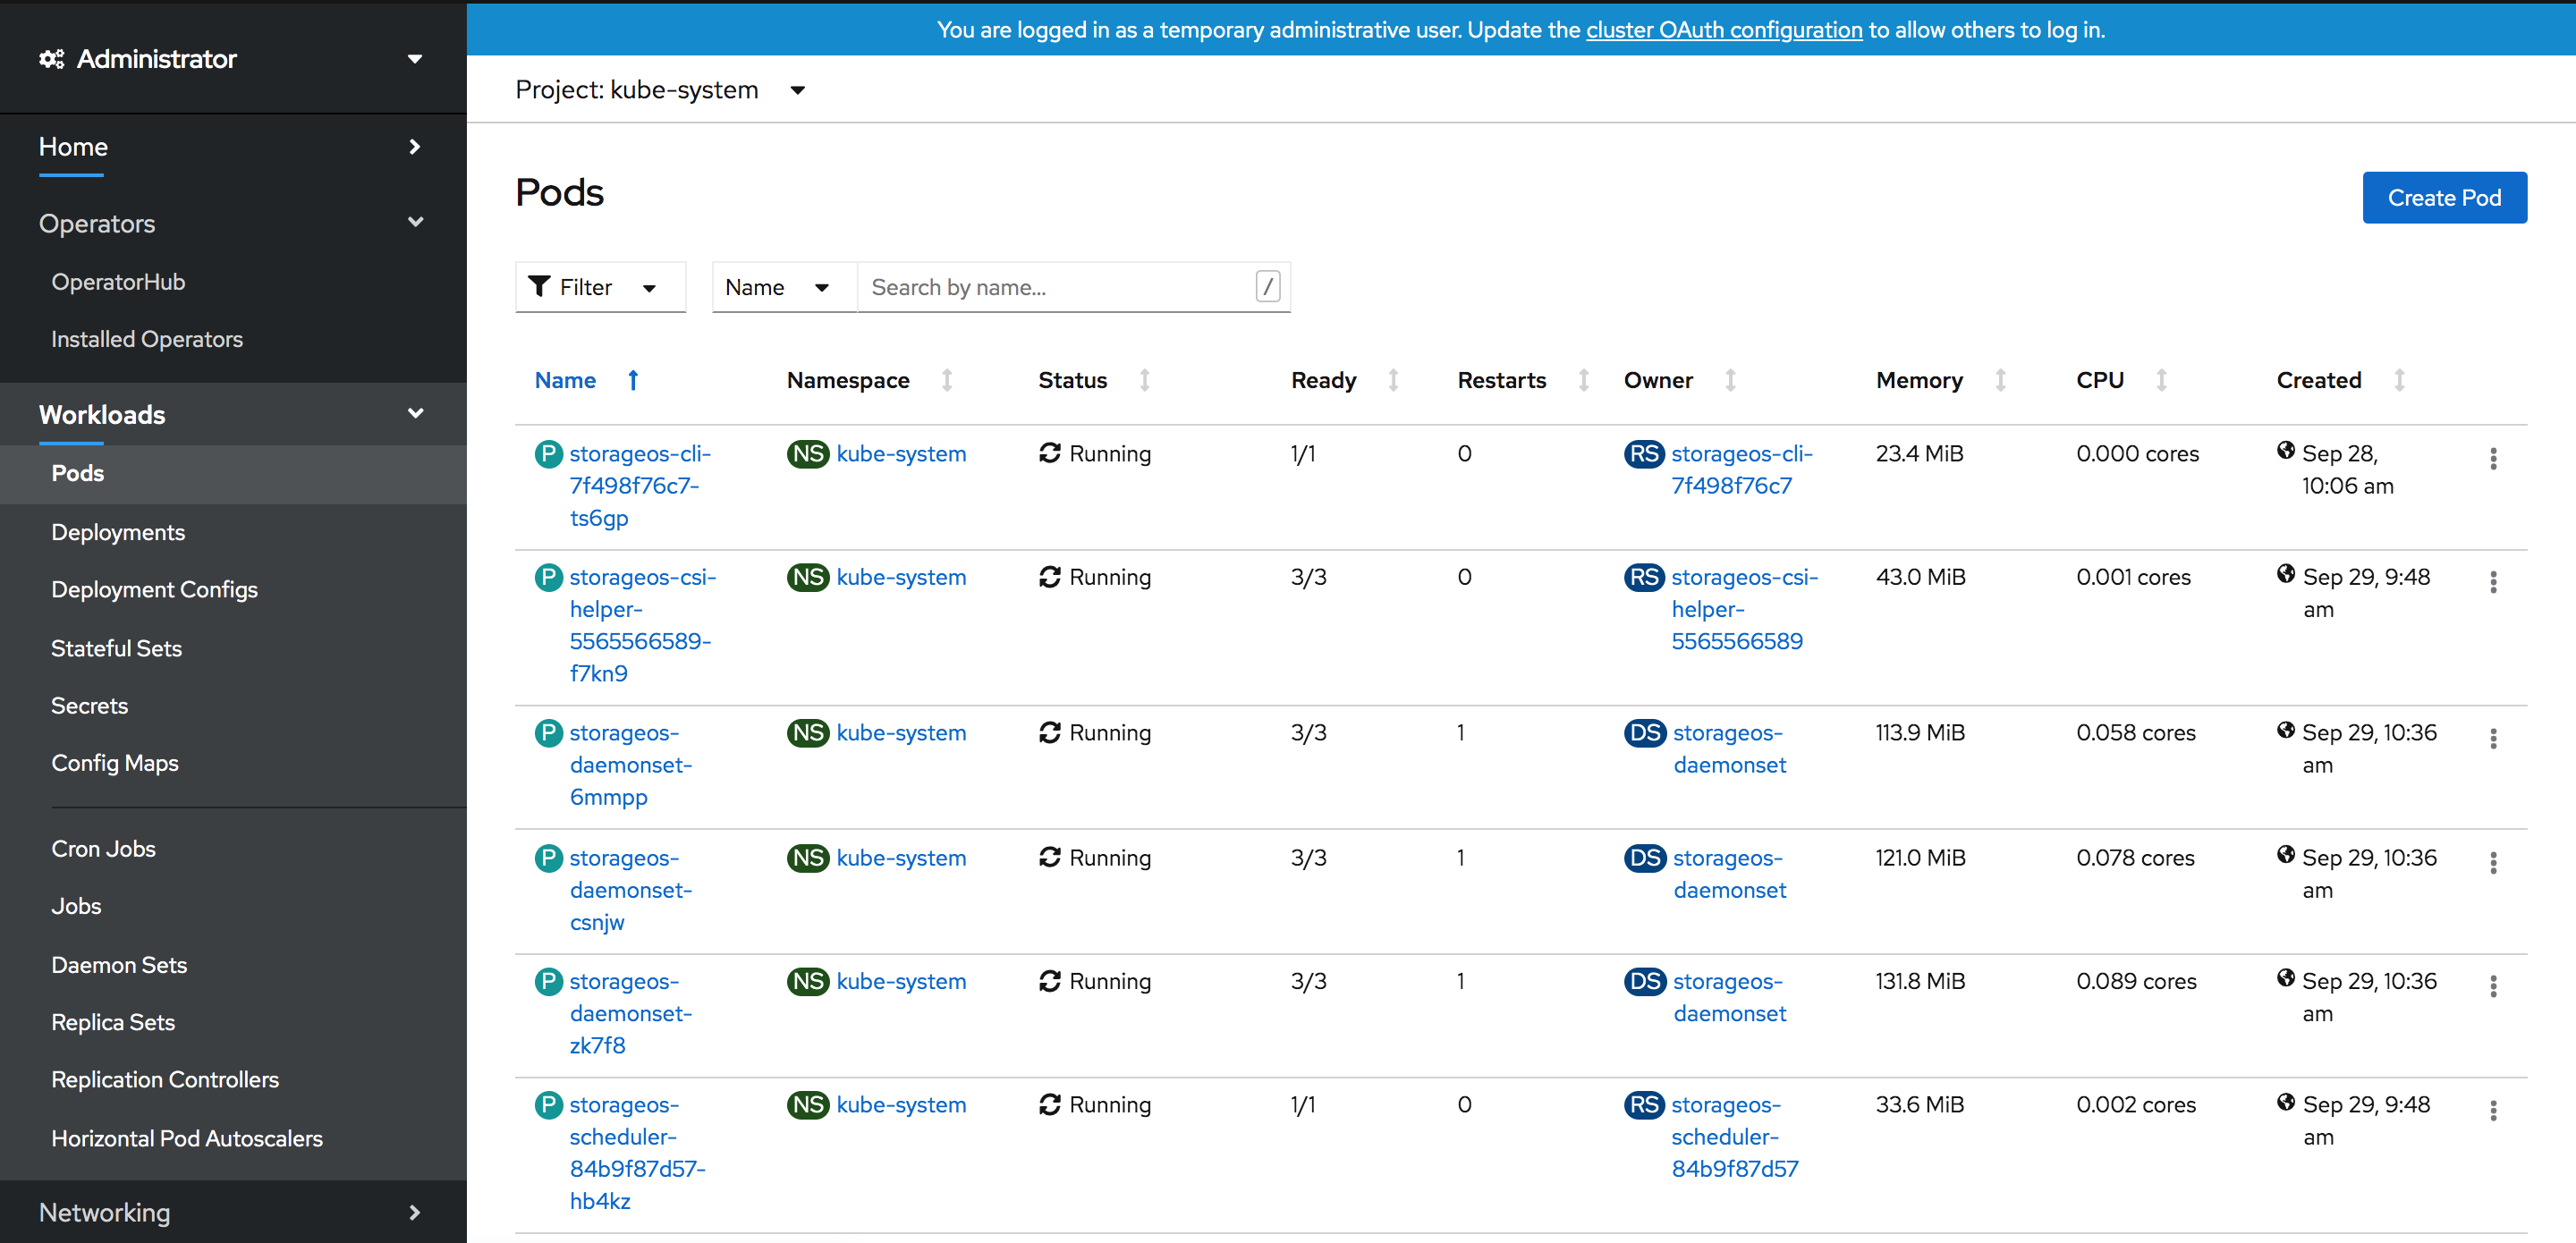
A Status of 3/3 for the Daemonset Pods indicates that StorageOS is bootstrapped successfully.
-
License cluster
A newly installed StorageOS cluster does not include a licence. A cluster must be licensed within 24 hours of the installation. For more information, check the reference licence page.
You can apply a Free Developer licence following the operations licensing page, or purchase a licence contacting [email protected].
Red Hat Marketplace
The installation of StorageOS using the Red Hat Marketplace requires the Openshift cluster to be registered to the Marketplace Portal, including the roll out of the PullSecret in your cluster. Failure to do so will result in a image pull authentication failure with the Red Hat registry.
-
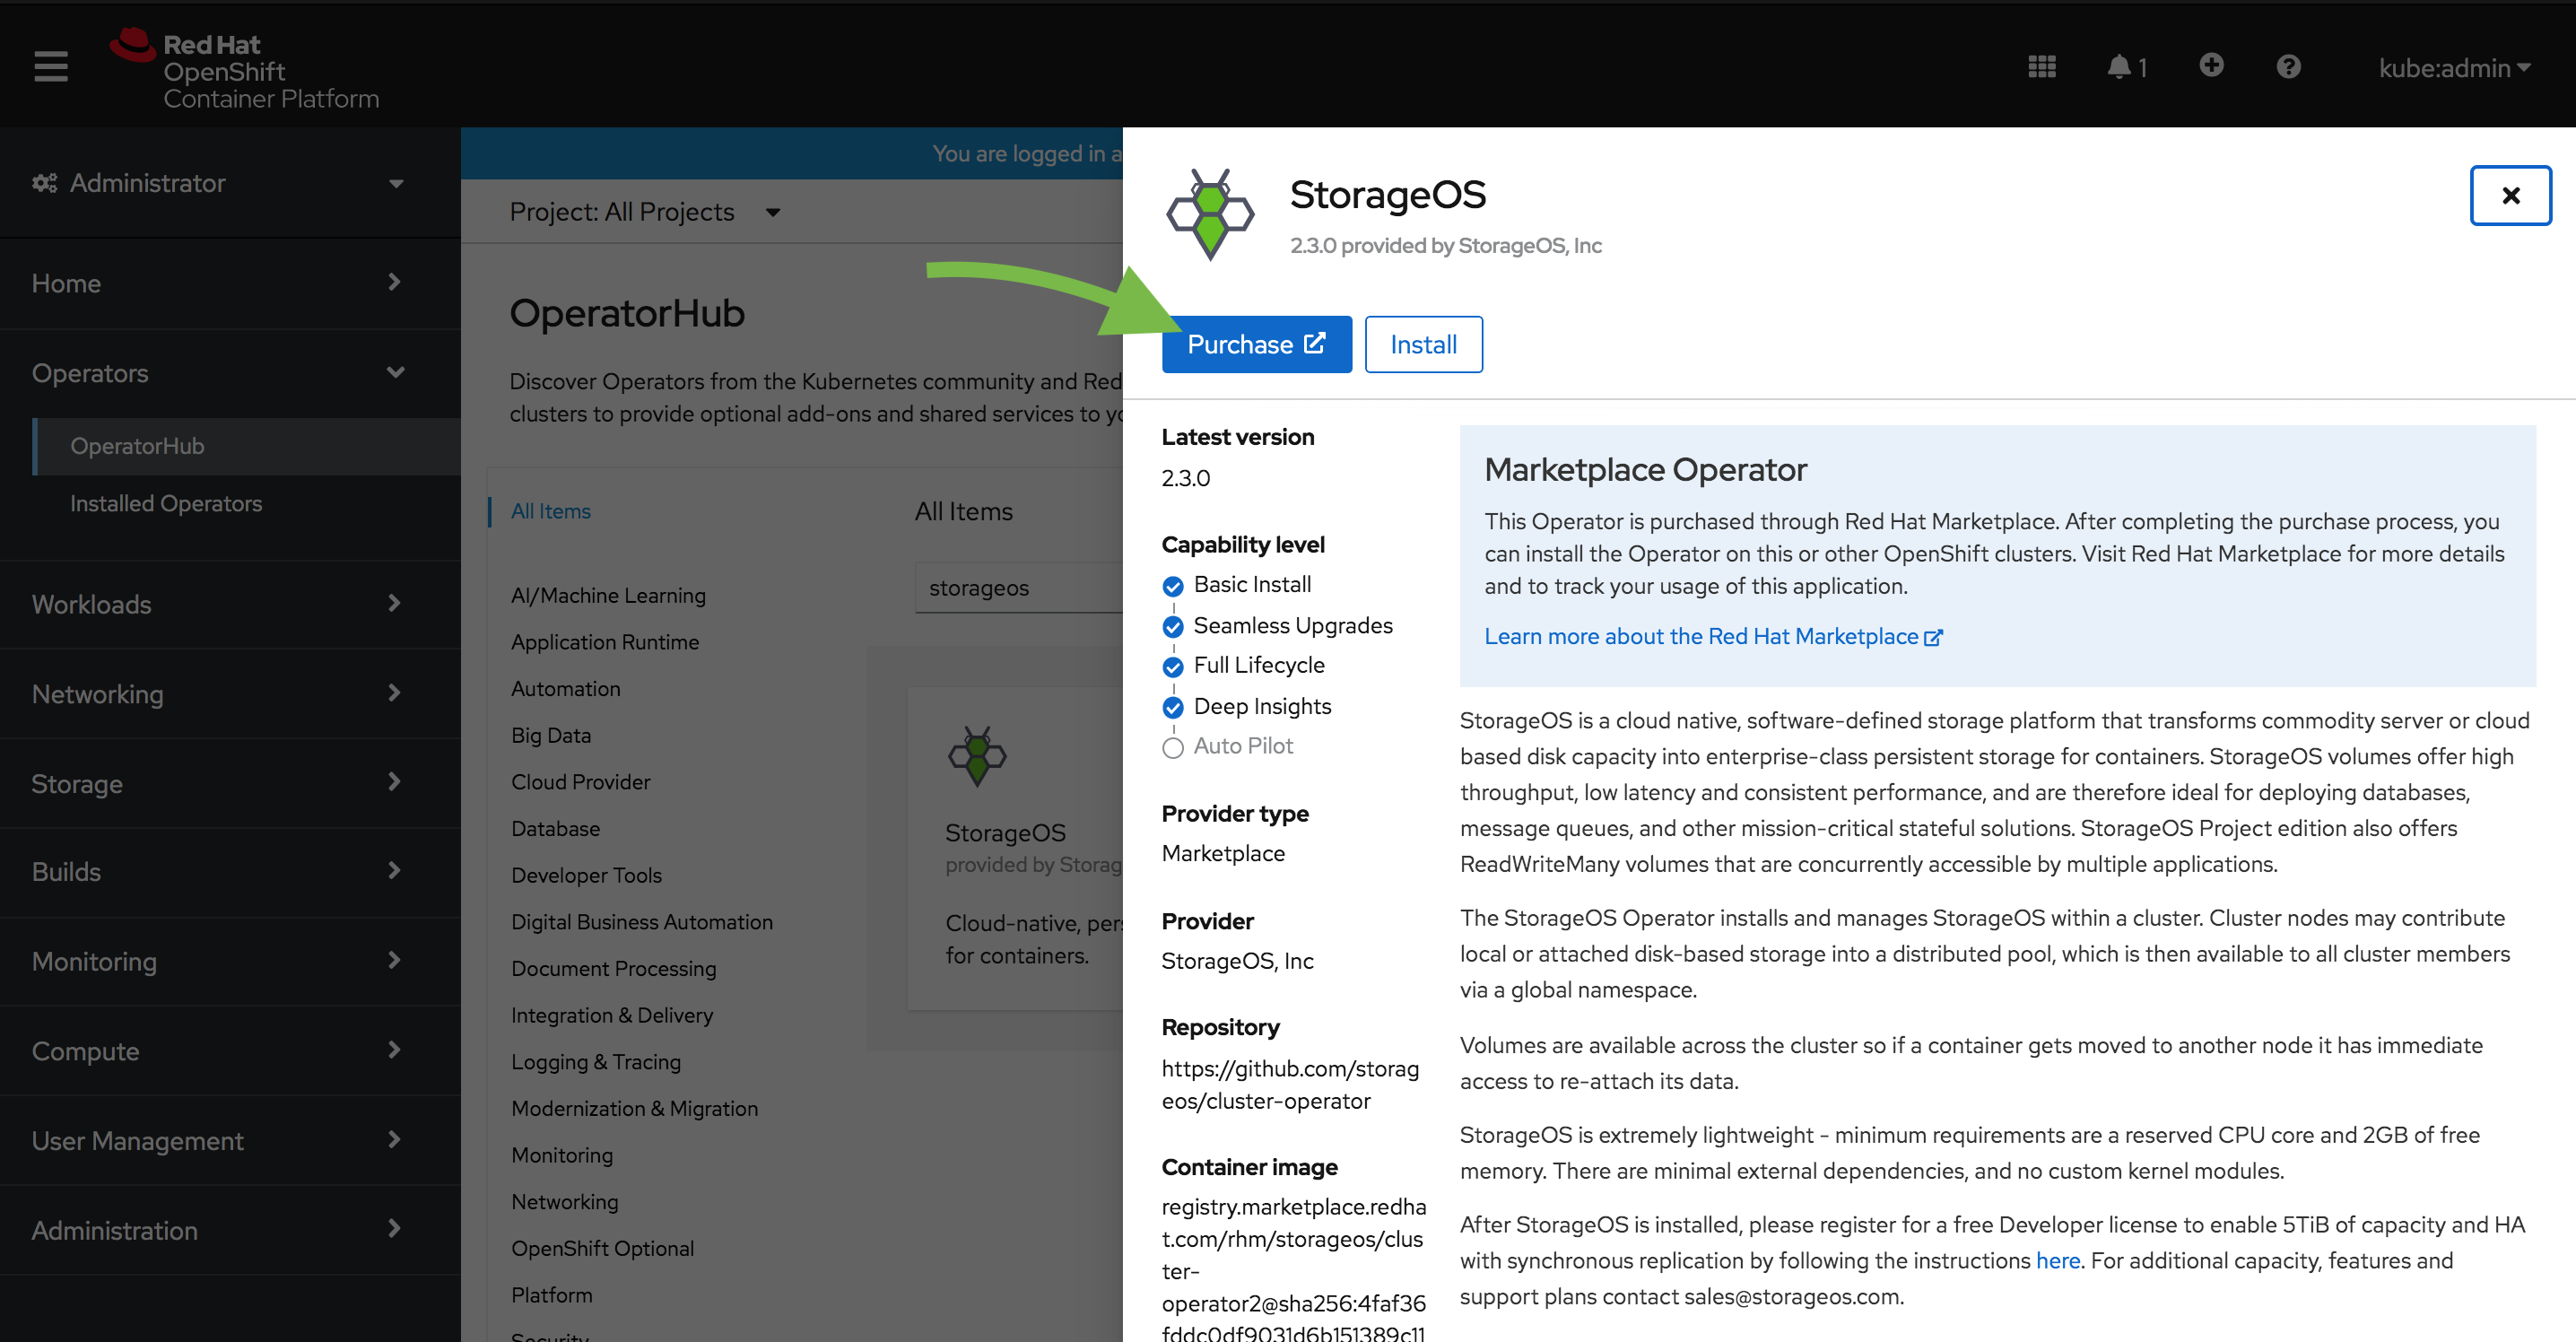
Select the
OperatorHubfrom the Catalog sub menu and search for StorageOS.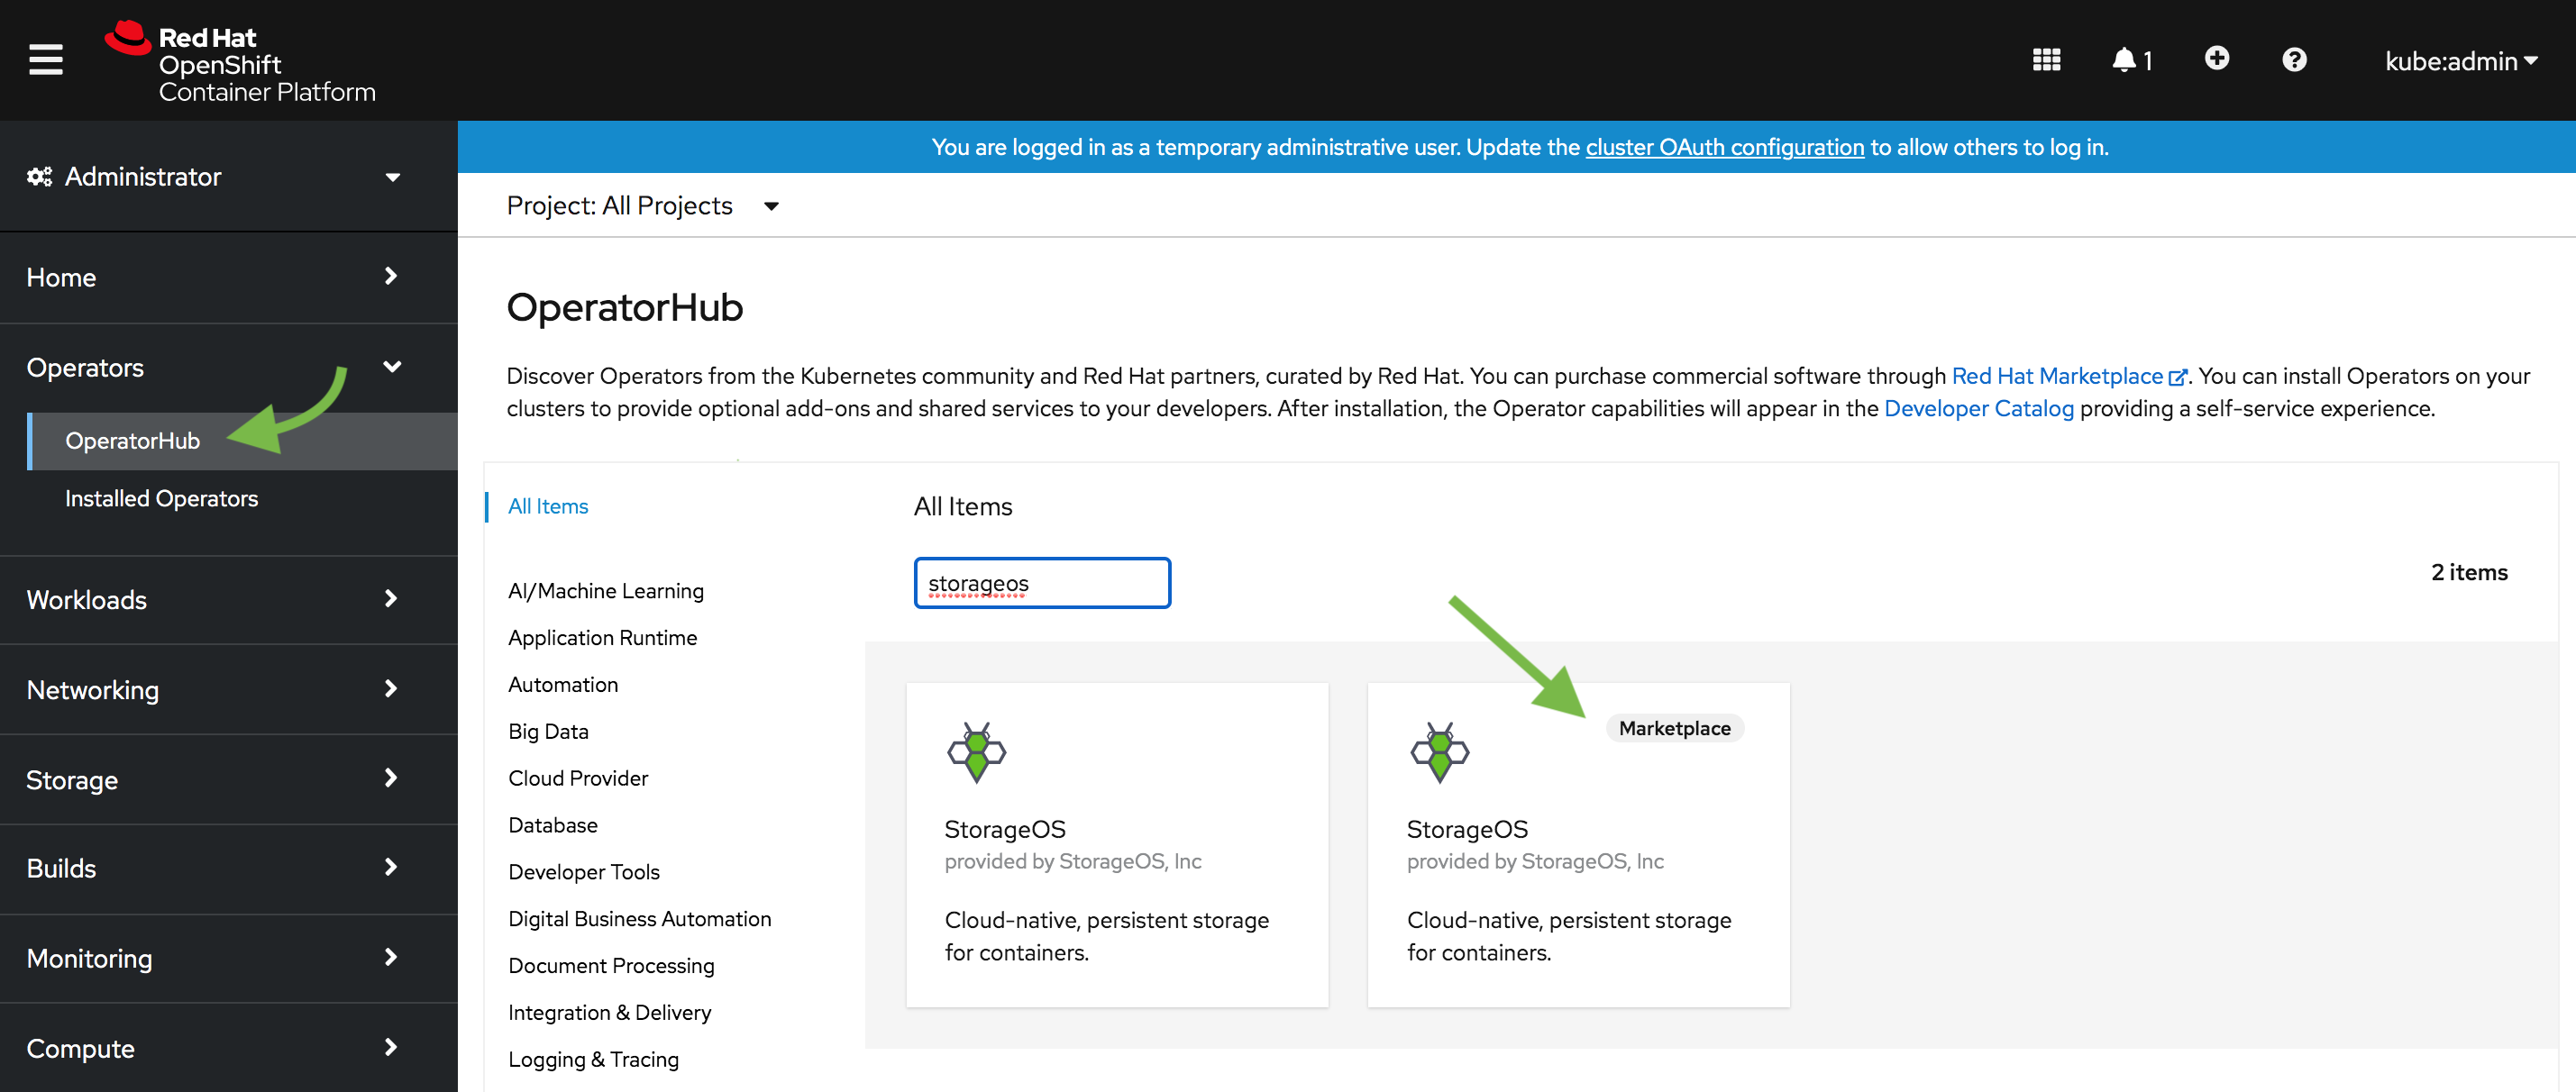
Choose the RedHat Marketplace option.
-
Select StorageOS and click purchase. Note that Openshift needs to be registered with the Red Hat Marketplace portal.
-
Select the most suitable install option.
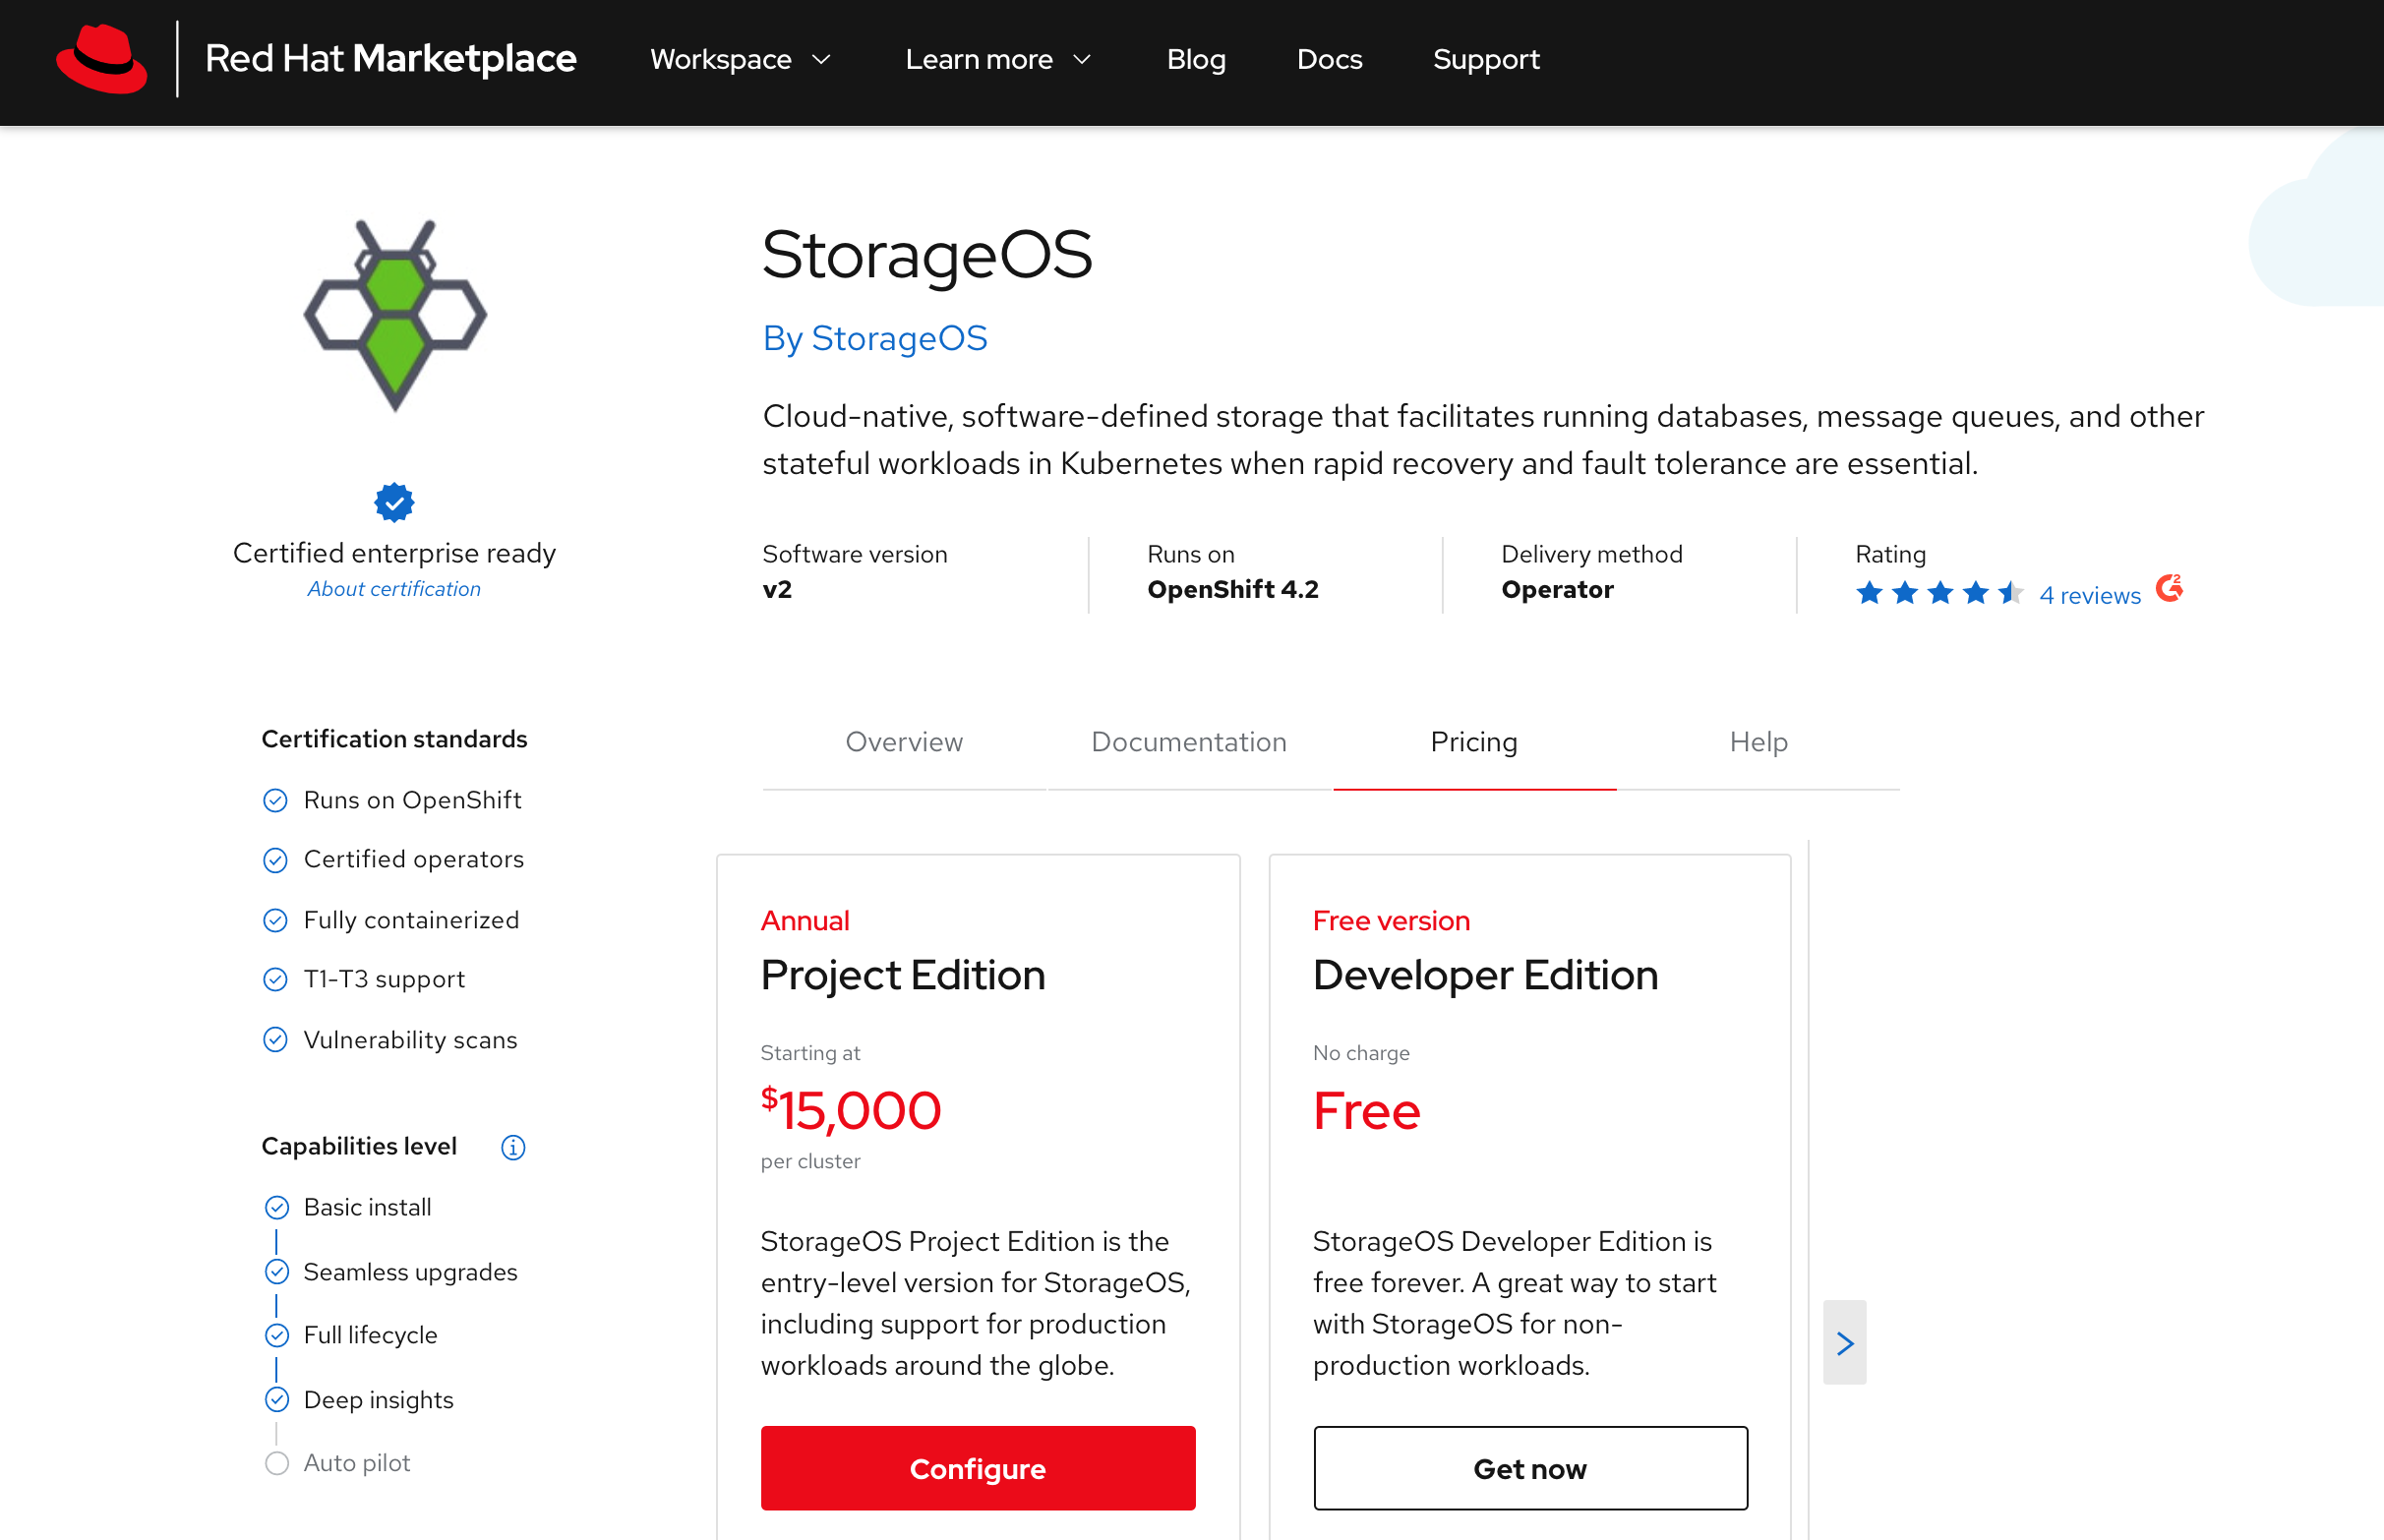
Project Edition is suitable for production workloads, Developer Edition for personal experimentation and evaluation.
-
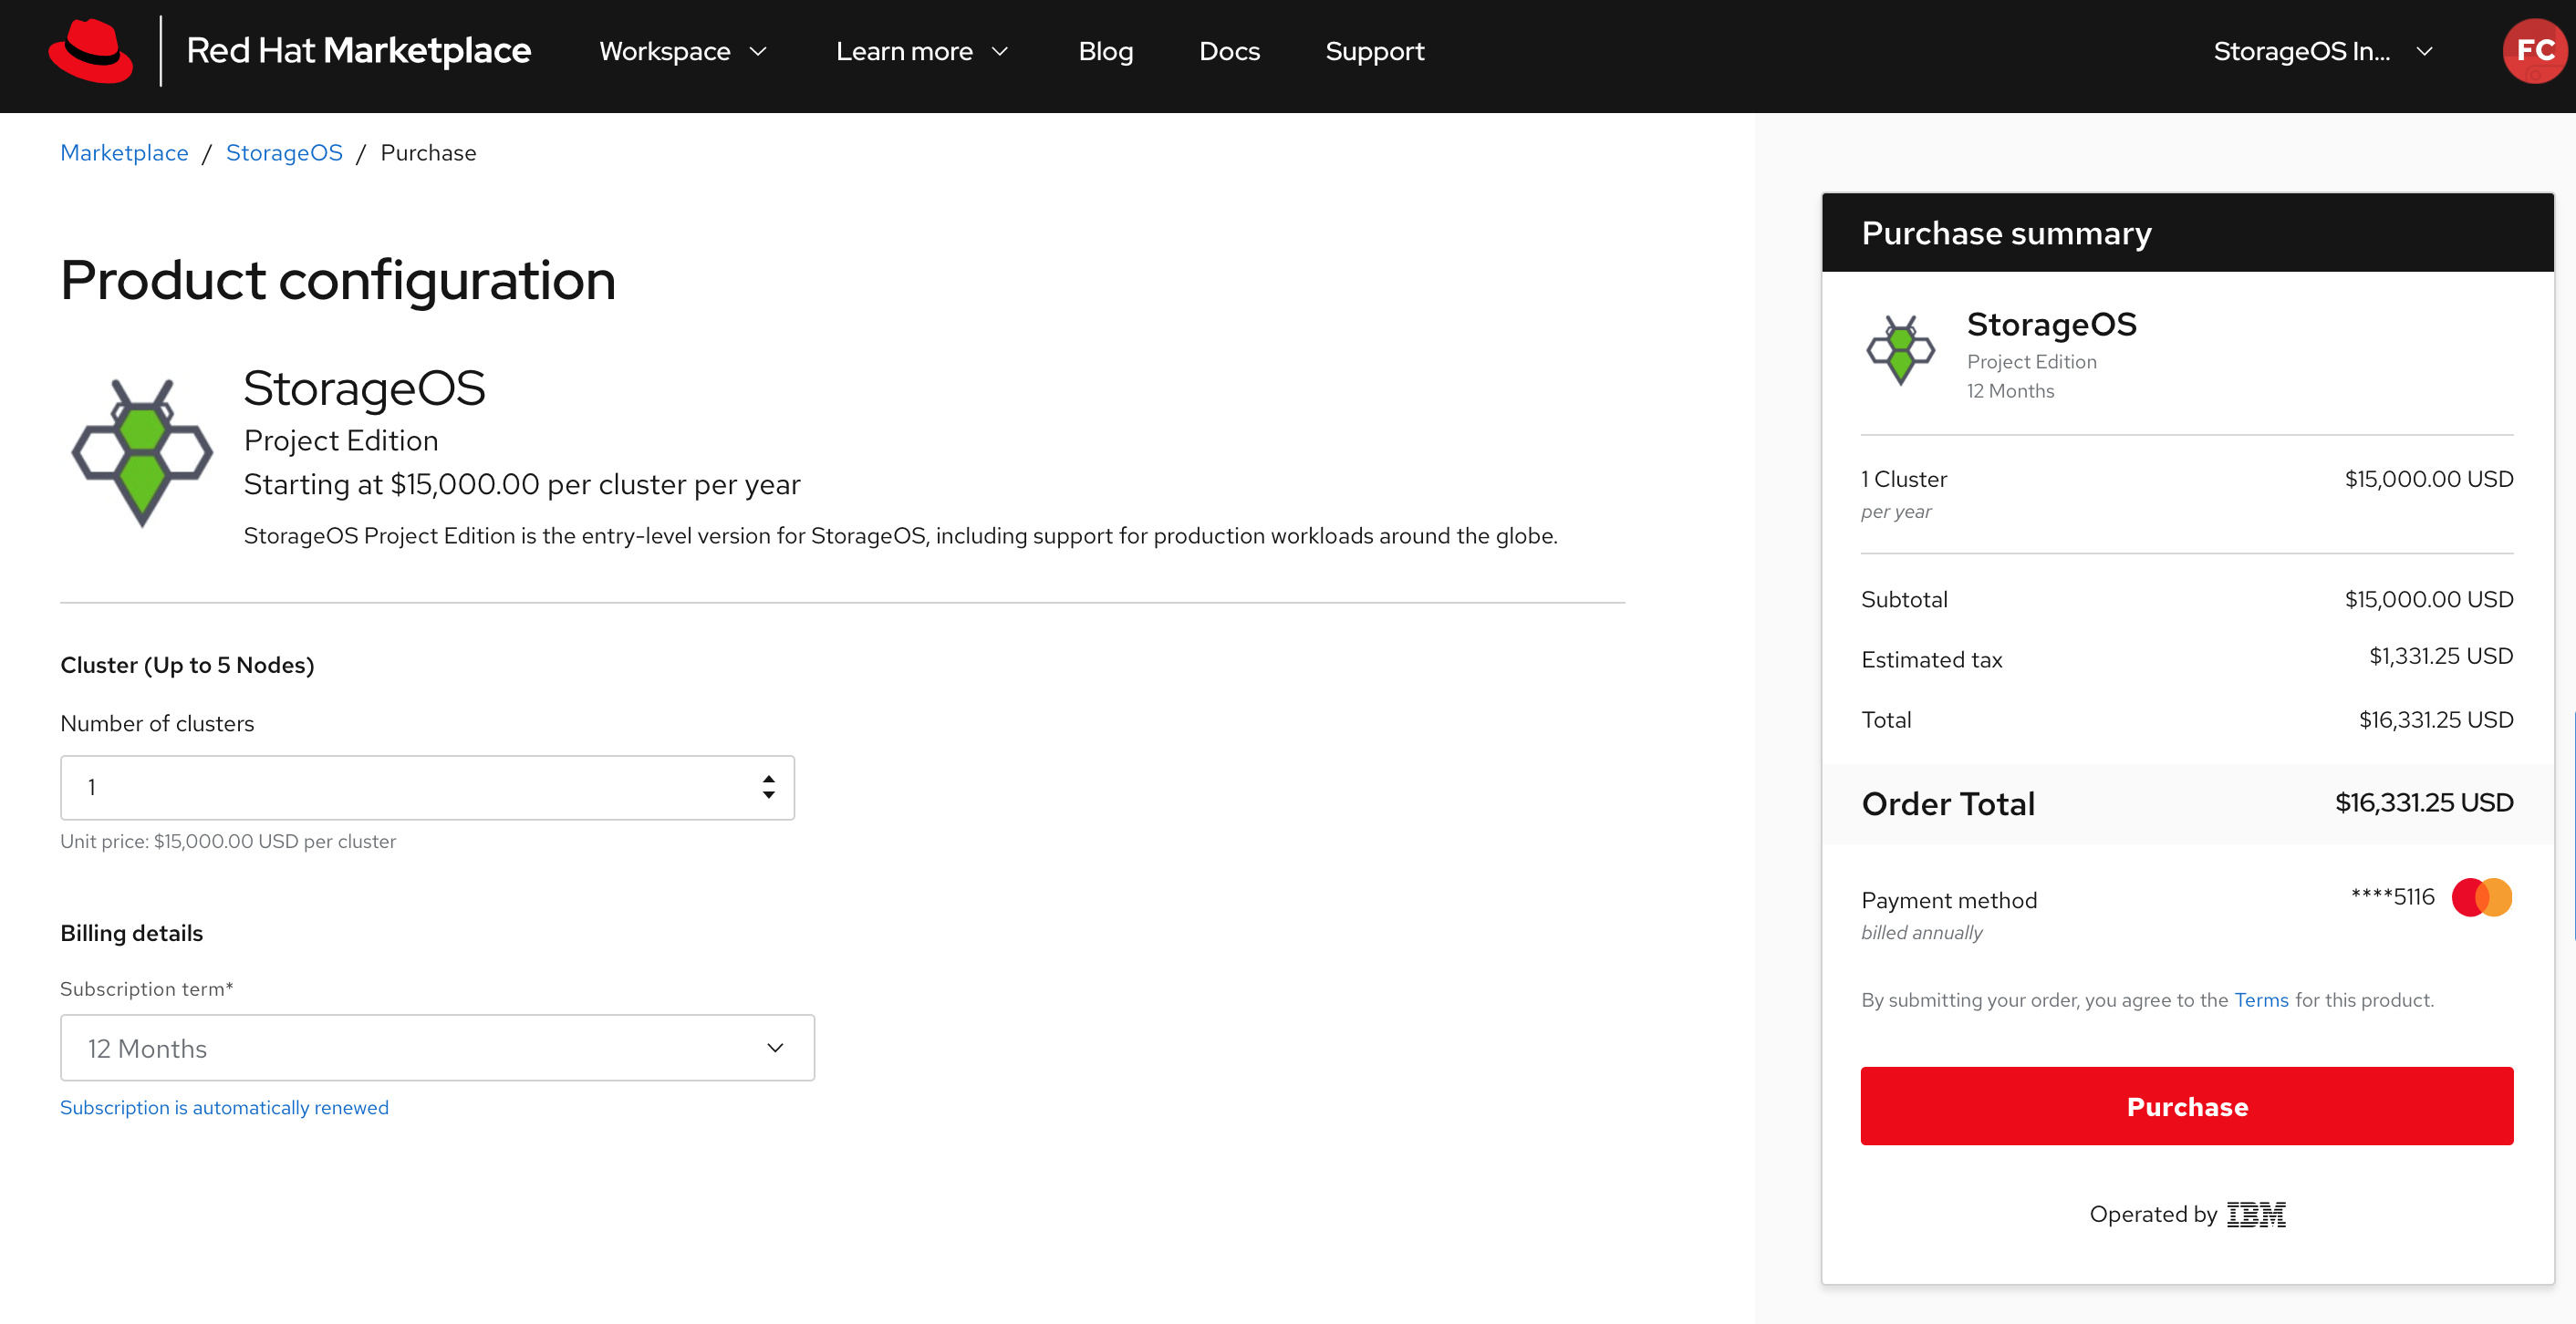
Specify the product configuration to fit your needs.
-
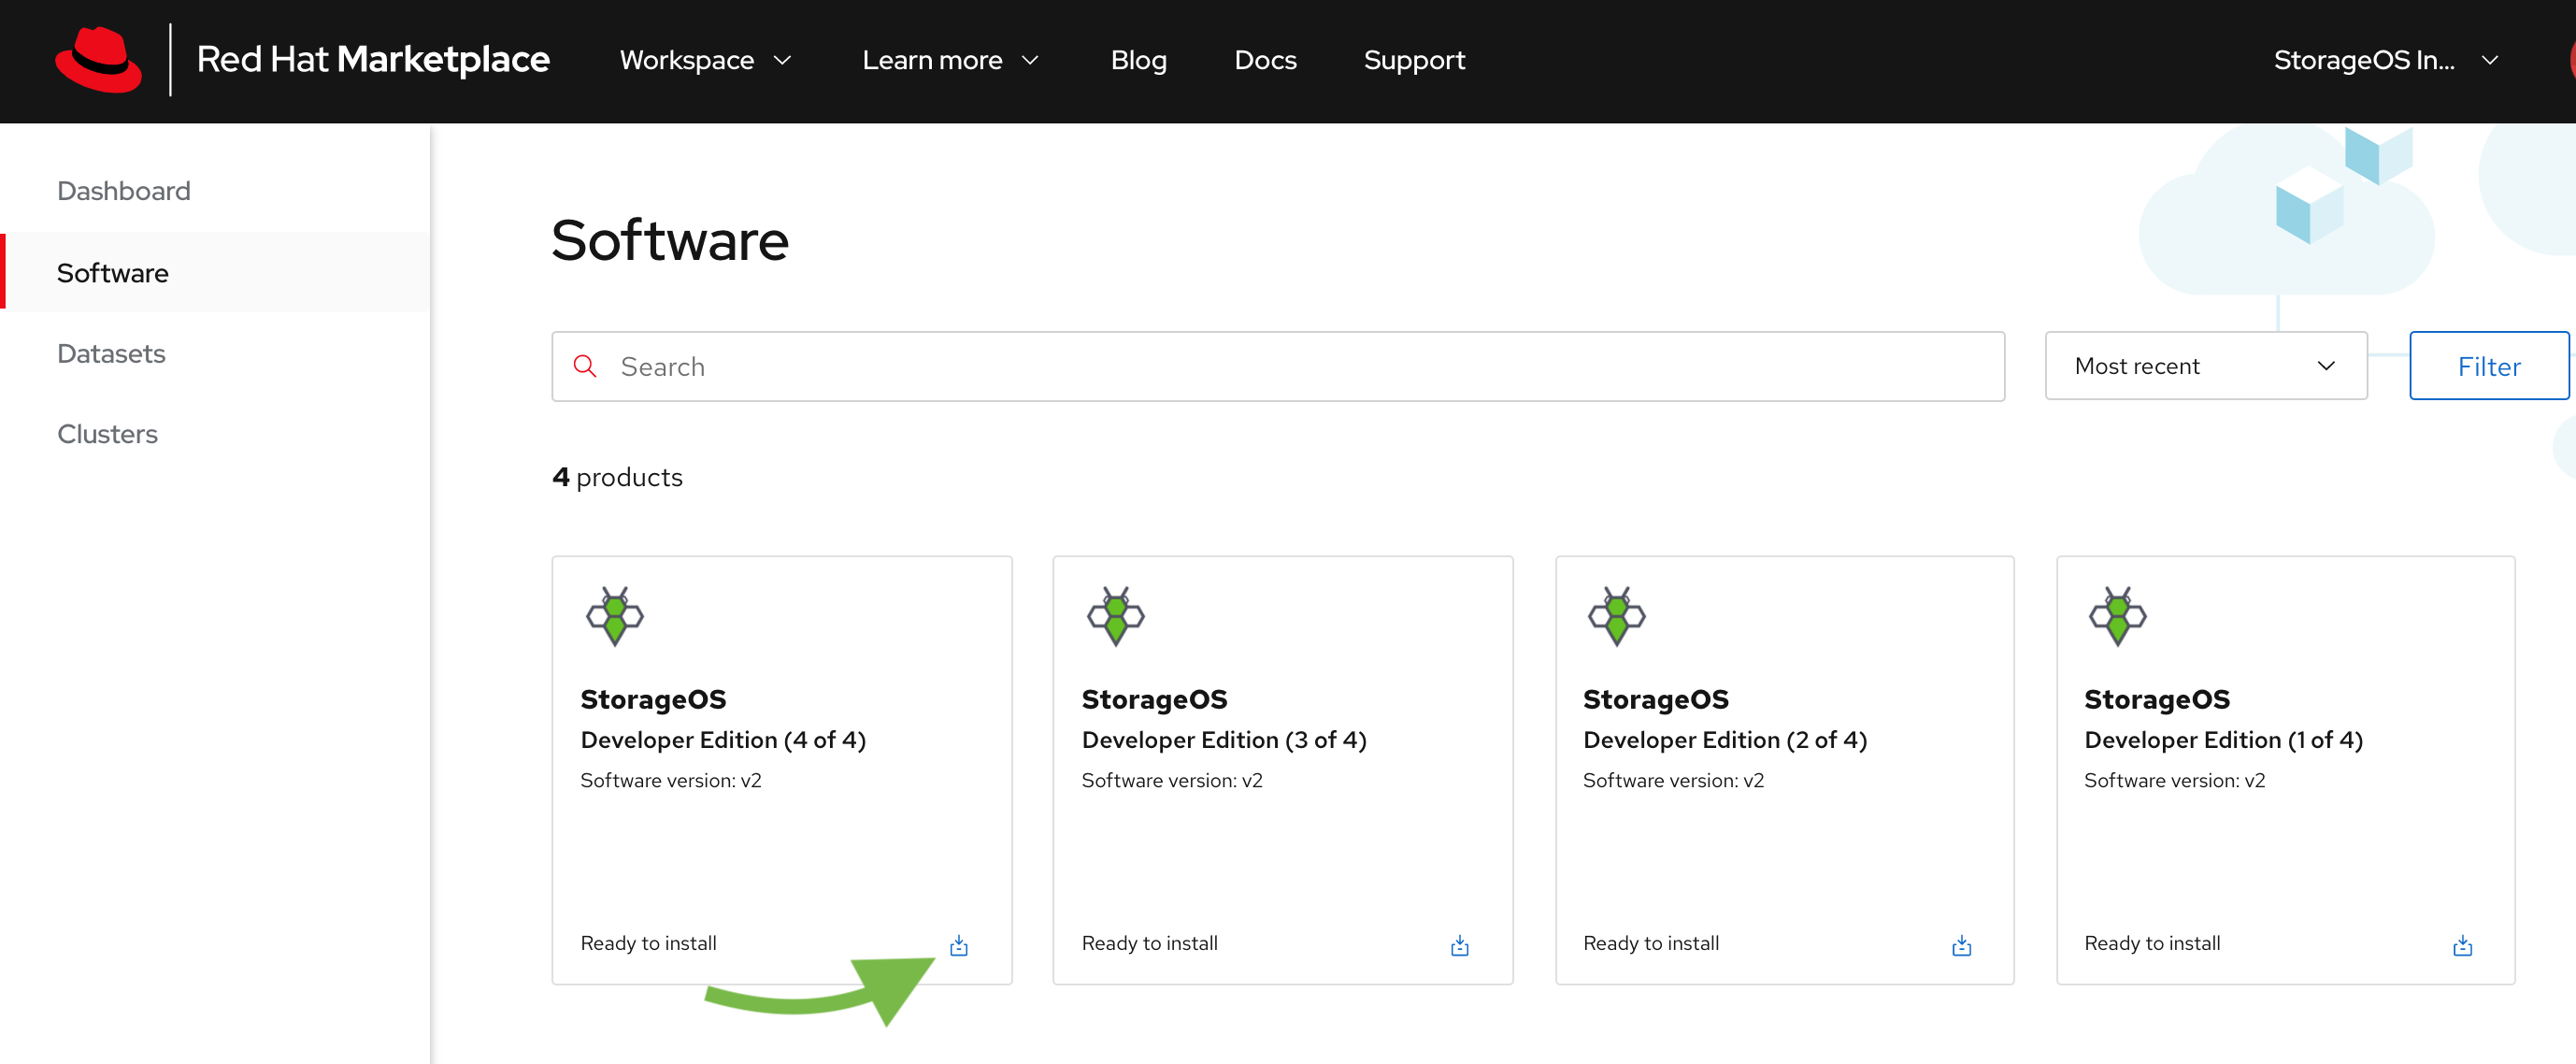
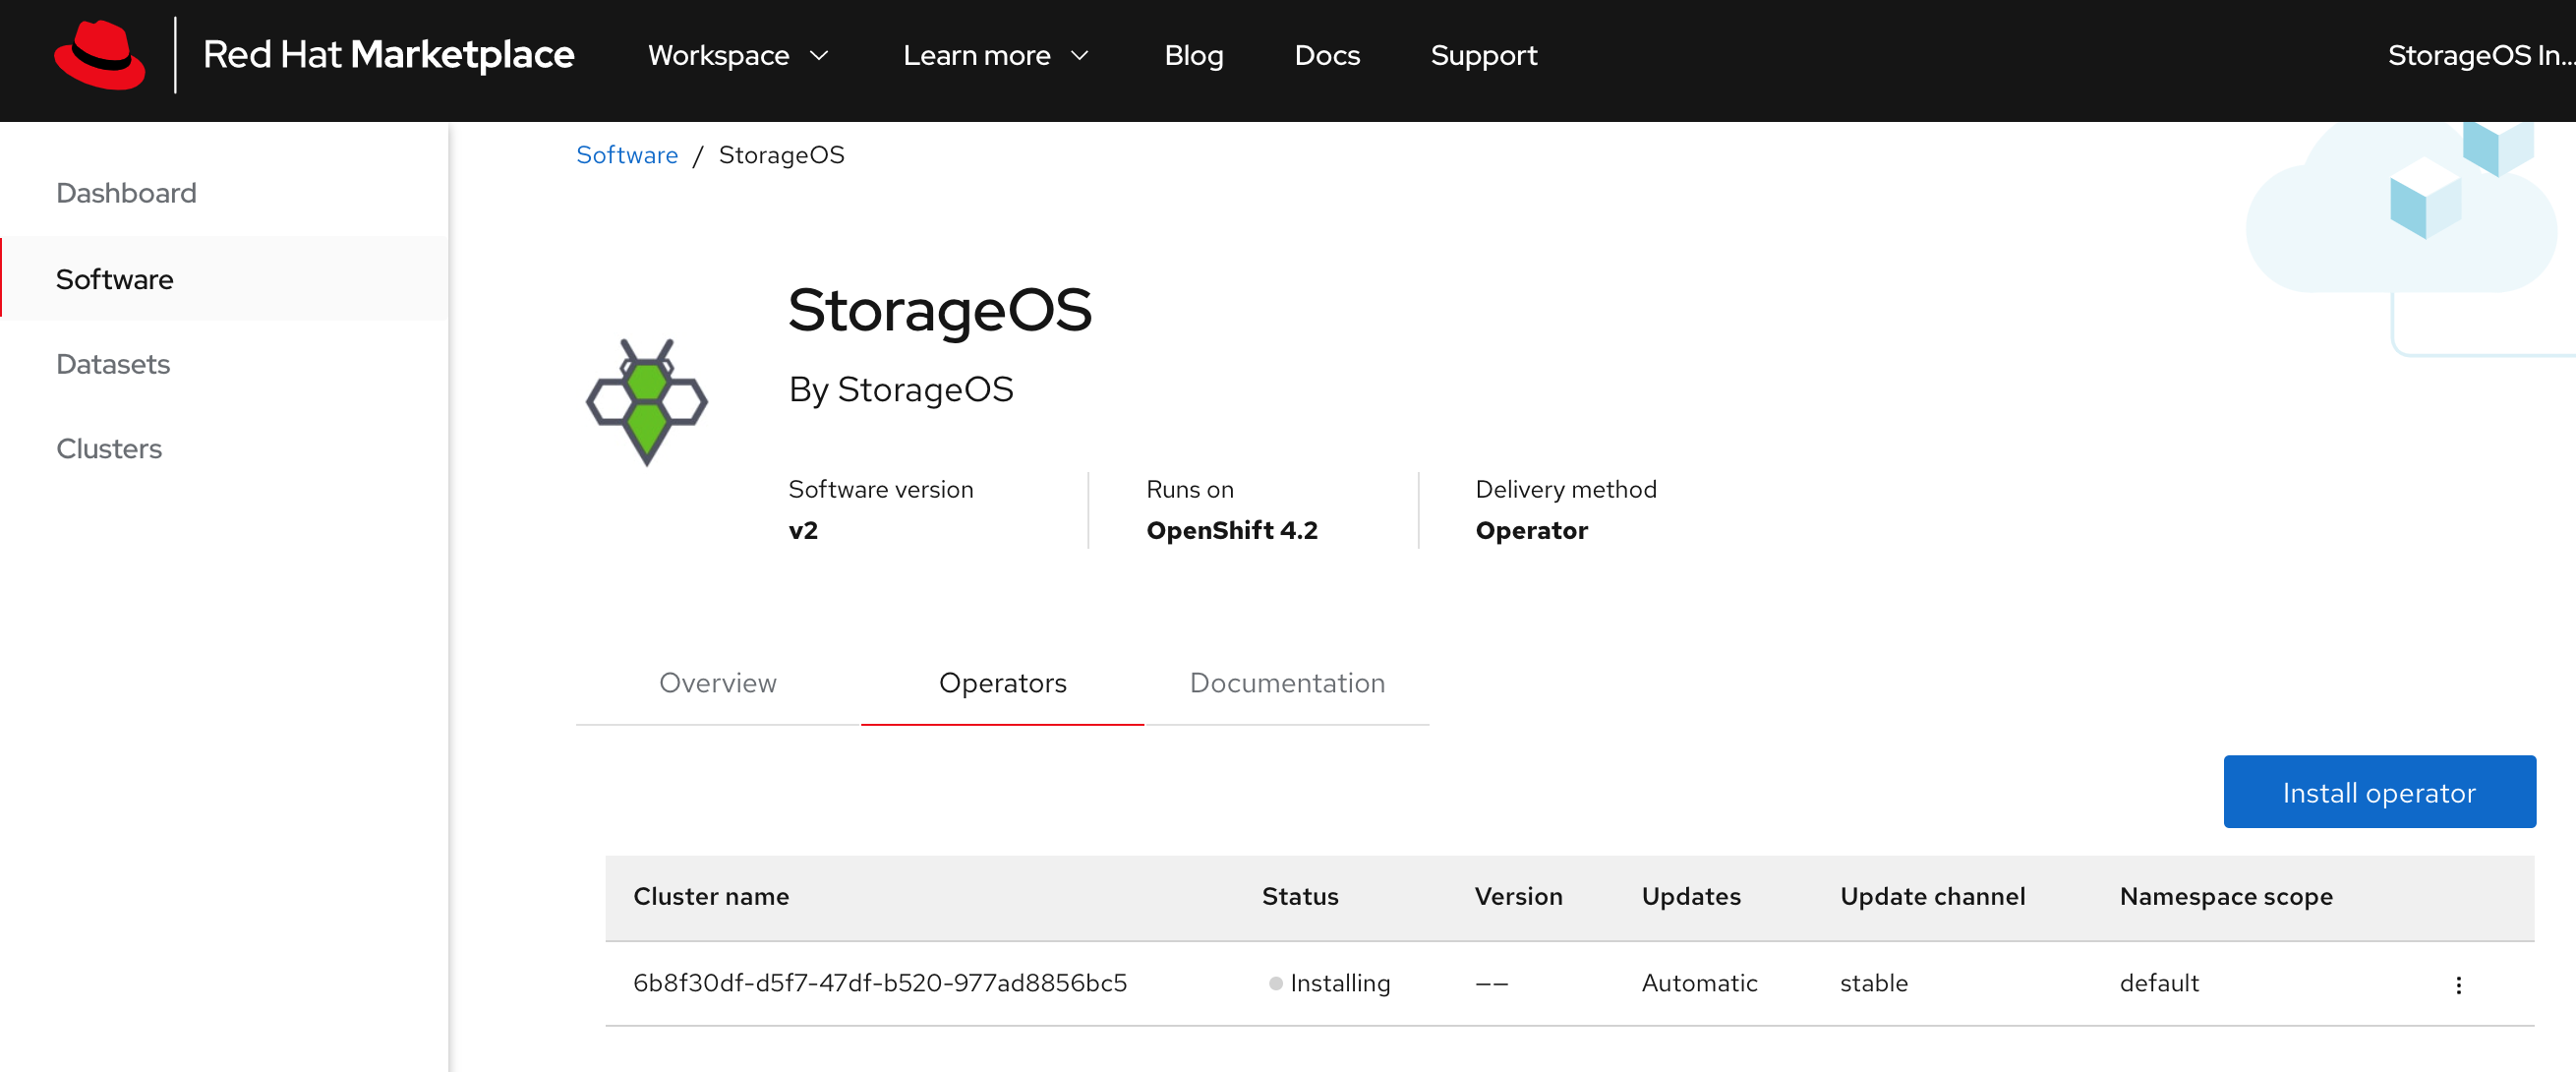
Navigate to your software within Red Hat Marketplace and install the StorageOS software as specified in the image.
-
Install the Operator. Set the update approval strategy to Automatic to ensure that you always have the latest version of StorageOS installed.

-
The StorageOS Cluster Operator is installed into your specified cluster.
-
Create a Secret in the
openshift-operatorsproject -
Use the YAML options to create a secret containing the
apiUsernameand anapiPasswordkey. The username and password defined in the secret will be used to authenticate when using the StorageOS CLI and GUI. For the communication between StorageOS and OpenShift, the CSI credentialscsiProvisionUsername,csiProvisionPassword,csiControllerPublishUsername,csiControllerPublishPassword,csiNodePublishUsername,csiNodePublishPasswordare needed. Take note of which project you created the secret in.Input the Secret as YAML for simplicity.
apiVersion: v1 kind: Secret metadata: name: storageos-api namespace: openshift-operators type: "kubernetes.io/storageos" data: # echo -n '<secret>' | base64 apiUsername: c3RvcmFnZW9z apiPassword: c3RvcmFnZW9z # CSI Credentials csiProvisionUsername: c3RvcmFnZW9z csiProvisionPassword: c3RvcmFnZW9z csiControllerPublishUsername: c3RvcmFnZW9z csiControllerPublishPassword: c3RvcmFnZW9z csiNodePublishUsername: c3RvcmFnZW9z csiNodePublishPassword: c3RvcmFnZW9z csiControllerExpandUsername: c3RvcmFnZW9z csiControllerExpandPassword: c3RvcmFnZW9z -
Go to StorageOS in your “Installed Operators”
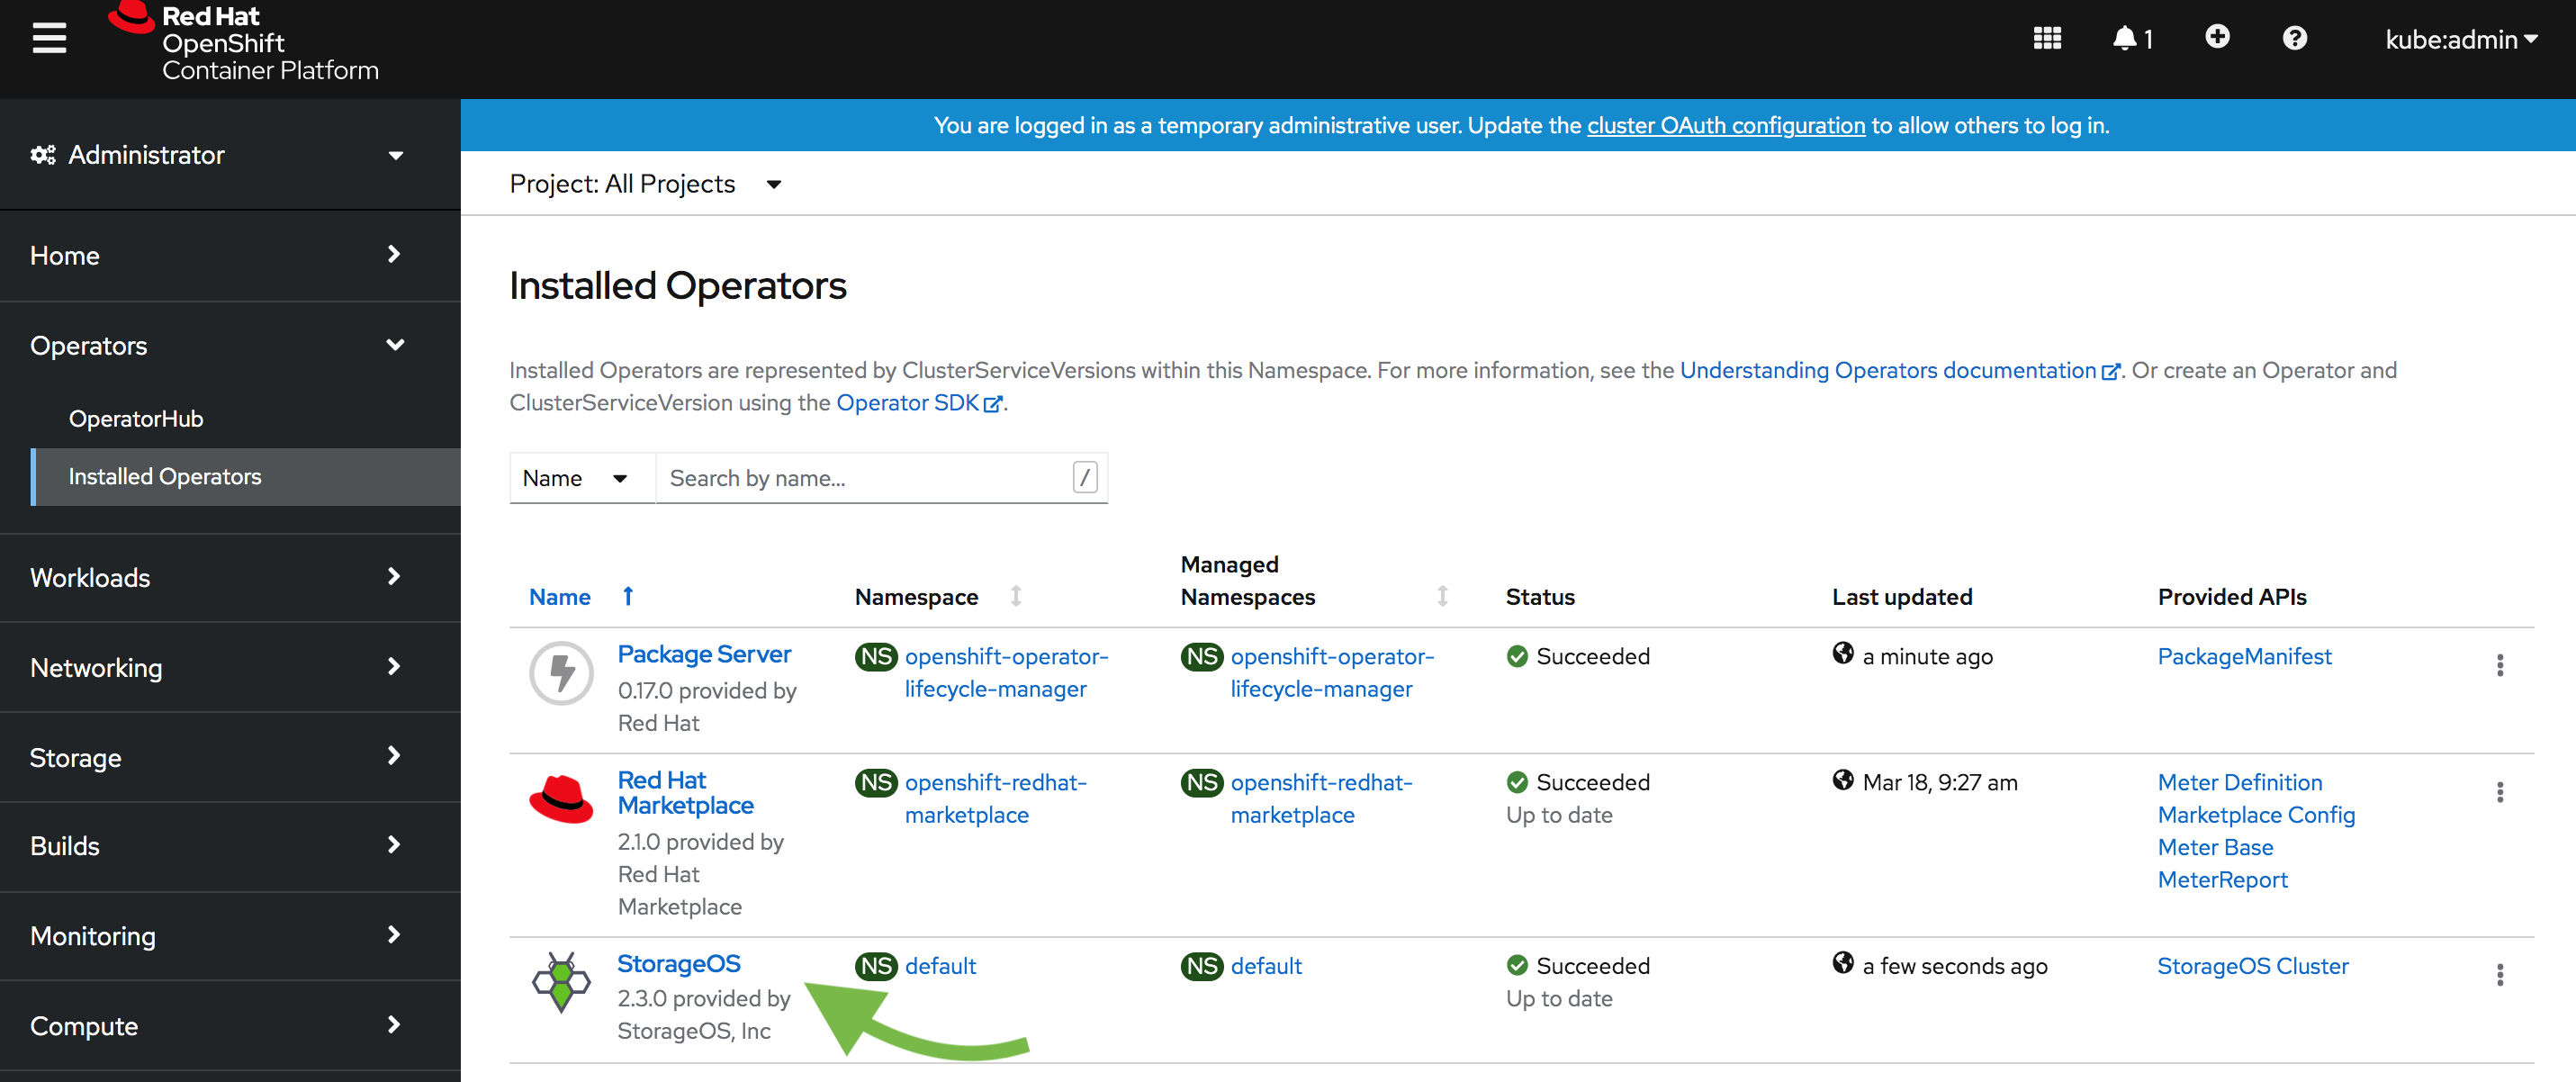
Verify that the StorageOS Cluster Operator is installed
-
Go to the “StorageOS Cluster” section
-
Create the StorageOS Cluster
A StorageOS Cluster is defined using a Custom Resource Definition
-
Create the Custom Resource
The StorageOS cluster resource describes the StorageOS cluster that will be created. Parameters such as the
secretRefName, thesecretRefNamespaceand thekvBackend.addressare mandatory.Additional
specparameters are available on the Cluster Operator configuration page.apiVersion: "storageos.com/v1" kind: StorageOSCluster metadata: name: storageos namespace: openshift-operators spec: # StorageOS Pods are in kube-system by default secretRefName: "storageos-api" # Reference the Secret created in the previous step secretRefNamespace: "openshift-operators" # Namespace of the Secret created in the previous step k8sDistro: "openshift" kvBackend: address: 'storageos-etcd-client.etcd:2379' # Example address, change for your etcd endpoint # address: '10.42.15.23:2379,10.42.12.22:2379,10.42.13.16:2379' # You can set ETCD server ips resources: requests: memory: "512Mi" cpu: 1 # nodeSelectorTerms: # - matchExpressions: # - key: "node-role.kubernetes.io/worker" # Compute node label will vary according to your installation # operator: In # values: # - "true" -
Verify that the StorageOS Cluster Resource enters a running state.
It can take up to a minute to report the StorageOS Pods ready
-
Check the StorageOS Pods in the
kube-systemprojectA Status of 3/3 for the Daemonset Pods indicates that StorageOS is bootstrapped successfully.
-
License cluster
A newly installed StorageOS cluster does not include a licence. A cluster must be licensed within 24 hours of the installation. For more information, check the reference licence page.
You can apply a Free Developer licence following the operations licensing page, or purchase a licence contacting [email protected].
Manual install
The StorageOS Cluster Operator is a Kubernetes native application developed to deploy and configure StorageOS clusters, and assist with maintenance operations. We recommend its use for standard installations.
The operator is a Kubernetes controller that watches the StorageOSCluster
CRD. Once the controller is ready, a StorageOS cluster definition can be
created. The operator will deploy a StorageOS cluster based on the
configuration specified in the cluster definition.
Helm Note: If you want to use Helm to install StorageOS, follow the StorageOS Operator Helm Chart documentation.
Steps to install StorageOS:
- Install StorageOS Operator
- Create a Secret for default username and password
- Trigger bootstrap using a CustomResource
- Apply StorageOS licence
1. Install StorageOS operator
Install the StorageOS Cluster Operator using the following yaml manifest.
oc create -f https://github.com/storageos/cluster-operator/releases/download/v2.4.4/storageos-operator.yaml
Verify the Cluster Operator Pod Status
[root@master03]# oc -n storageos-operator get pod
NAME                                         READY     STATUS    RESTARTS   AGE
storageoscluster-operator-68678798ff-f28zw   1/1       Running   0          3m
The READY 1/1 indicates that
storageosclusterresources can be created.
2. Create a Secret
Before deploying a StorageOS cluster, create a Secret defining the StorageOS API Username and Password in base64 encoding. The API username and password are used to create the default StorageOS admin account which can be used with the StorageOS CLI and to login to the StorageOS GUI. The CSI credentials are used to register the CSI accounts, so Kubernetes and StorageOS communicate over an authenticated API.
apiVersion: v1
kind: Secret
metadata:
  name: "storageos-api"
  namespace: "storageos-operator"
  labels:
    app: "storageos"
type: "kubernetes.io/storageos"
data:
  # echo -n '<secret>' | base64
  apiUsername: c3RvcmFnZW9z
  apiPassword: c3RvcmFnZW9z
  # CSI Credentials
  csiProvisionUsername: c3RvcmFnZW9z
  csiProvisionPassword: c3RvcmFnZW9z
  csiControllerPublishUsername: c3RvcmFnZW9z
  csiControllerPublishPassword: c3RvcmFnZW9z
  csiNodePublishUsername: c3RvcmFnZW9z
  csiNodePublishPassword: c3RvcmFnZW9z
  csiControllerExpandUsername: c3RvcmFnZW9z
  csiControllerExpandPassword: c3RvcmFnZW9z
This example contains a default password, for production installations, use a unique, strong password.
You can define a base64 value by
echo -n "mystring" | base64.
Make sure that the encoding of the credentials doesn’t have special characters such as ‘\n’. The
echo -nensures that a trailing new line is not appended to the string.
If you wish to change the default accounts details post-install please see Managing Users
3 Trigger a StorageOS installation
This is a Cluster Definition example.
apiVersion: "storageos.com/v1"
kind: StorageOSCluster
metadata:
  name: "example-storageos"
  namespace: "storageos-operator"
spec:
  secretRefName: "storageos-api" # Reference from the Secret created in the previous step
  secretRefNamespace: "storageos-operator"  # Namespace of the Secret
  k8sDistro: "openshift"
  images:
    nodeContainer: "storageos/node:v2.4.4" # StorageOS version
  kvBackend:
    address: 'storageos-etcd-client.storageos-etcd:2379' # Example address, change for your etcd endpoint
  # address: '10.42.15.23:2379,10.42.12.22:2379,10.42.13.16:2379' # You can set ETCD server ips
  resources:
    requests:
      memory: "512Mi"
      cpu: 1
#  nodeSelectorTerms:
#    - matchExpressions:
#      - key: "node-role.kubernetes.io/worker" # Compute node label will vary according to your installation
#        operator: In
#        values:
#        - "true"
Additional
specparameters are available on the Cluster Operator configuration page.
You can find more examples such as deployments referencing a external etcd kv store for StorageOS in the Cluster Operator examples page.
Verify StorageOS Installation
[root@master03]# oc -n kube-system get pods -w
NAME                                    READY   STATUS    RESTARTS   AGE
storageos-csi-helper-5cf59b5b4-f5nwr    2/2     Running   0          3m
storageos-daemonset-75f6c               3/3     Running   0          3m
storageos-daemonset-czbqx               3/3     Running   0          3m
storageos-daemonset-zv4tq               3/3     Running   0          3m
storageos-scheduler-6d67b46f67-5c46j    1/1     Running   0          3m
The above command watches the Pods created by the Cluster Definition example. Note that pods typically take approximately 65 seconds to enter the Running Phase.
4. License cluster
Newly installed StorageOS clusters must be licensed within 24 hours. Our developer license is free, and supports up to 5TiB of provisioned storage.
To obtain a license, follow the instructions on our licensing operations page.
First StorageOS volume
If this is your first installation you may wish to follow the StorageOS Volume guide for an example of how to mount a StorageOS volume in a Pod.